 Skip to content

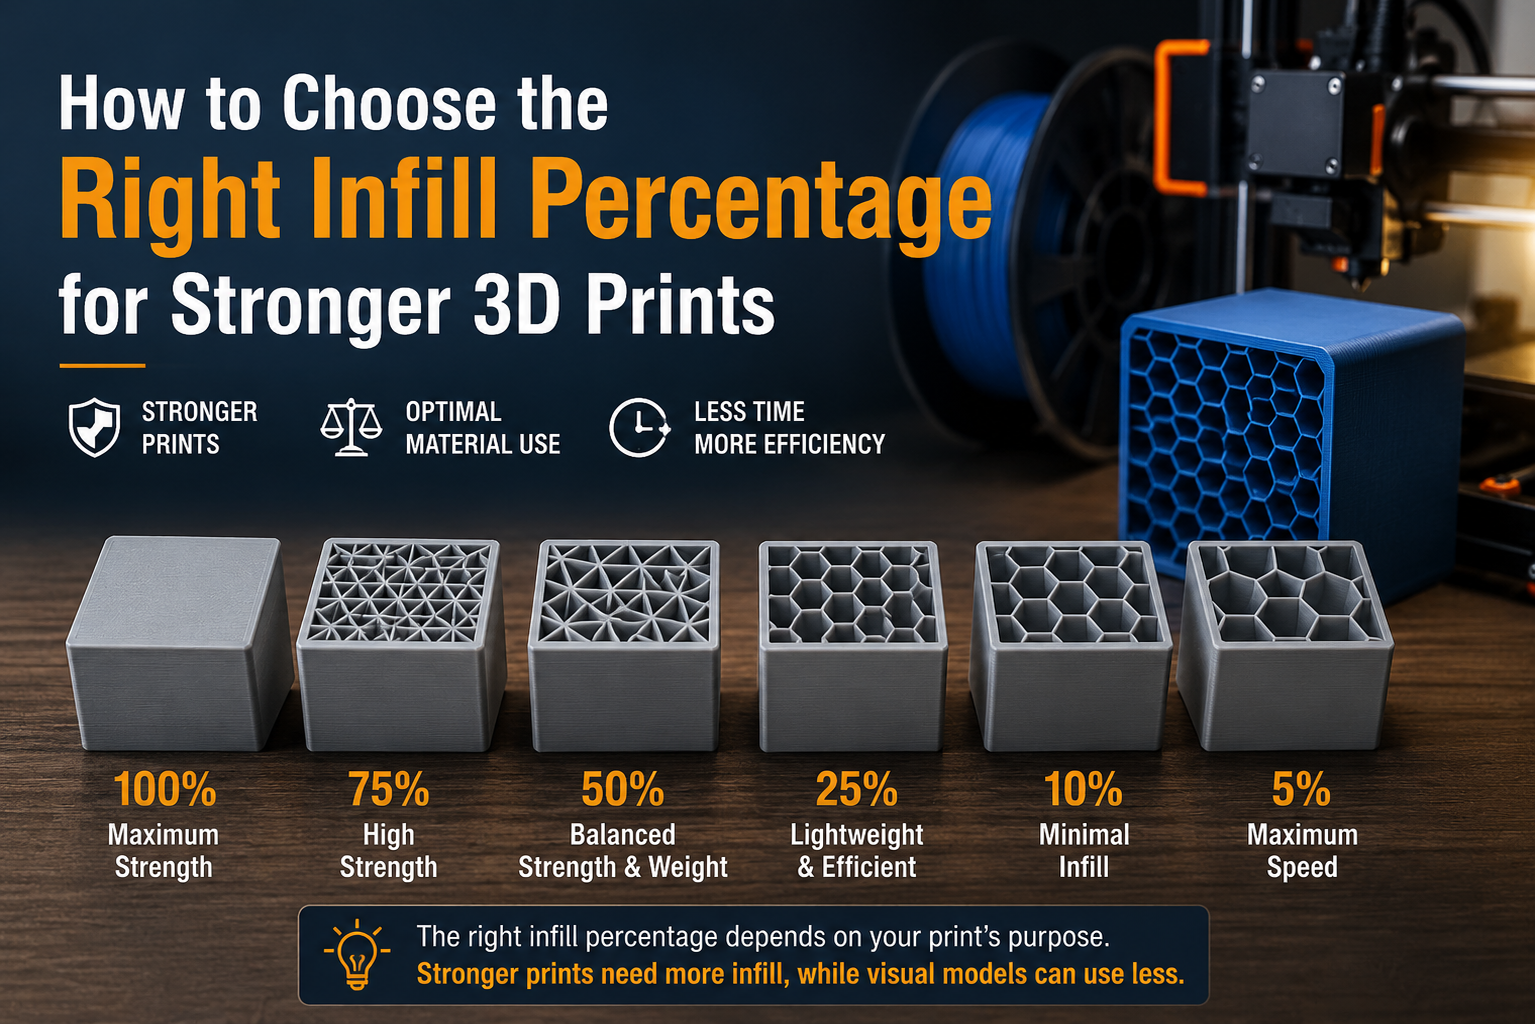
When creating a 3D print, most people focus on layer height, print speed, and nozzle temperature. However, one setting that has a major impact on the strength, weight, and print time of your model is the infill percentage.
Choosing the right infill percentage helps you create parts that are strong enough for their intended purpose without wasting filament or increasing print time unnecessarily. Whether you are printing decorative models, functional tools, or mechanical components, understanding infill settings can significantly improve your results.
What Is Infill in 3D Printing?
Infill is the internal structure printed inside a 3D model. Instead of printing a completely solid object, the printer creates a pattern within the outer walls to provide strength and support.
The infill percentage determines how much of the inside of the model is filled with material.
Benefits of Using Infill
- Improves structural strength
- Reduces filament consumption
- Shortens print times
- Lowers the overall weight of the model
- Provides support for top layers
Finding the right balance between strength and efficiency is the key to successful 3D printing.
Common Infill Percentages and Their Uses
Different projects require different levels of infill. Selecting the appropriate percentage depends on how the finished part will be used.
10% to 15% Infill
This range is suitable for lightweight objects that are mainly decorative.
Best For
Advantages
- Faster printing
- Lower filament usage
- Lightweight finished parts
If strength is not a priority, low infill can save both time and material.
20% to 30% Infill
This is one of the most commonly used ranges for everyday printing.
Best For
- Household organisers
- Storage containers
- Phone stands
- Educational models
- General-purpose prints
Advantages
- Good balance between strength and print time
- Efficient material usage
- Suitable for most hobby projects
Many users consider this range the ideal starting point for everyday 3D printing.
40% to 60% Infill
Higher infill percentages create stronger parts that can withstand regular use and moderate loads.
Best For
- Mechanical components
- Workshop accessories
- Tool holders
- Functional prototypes
- Replacement parts
Advantages
- Increased durability
- Better impact resistance
- Improved load-bearing performance
This range is recommended for prints that need to perform under everyday stress.
80% to 100% Infill
Solid or nearly solid prints are used when maximum strength is required.
Best For
- Industrial components
- Heavy-duty brackets
- High-load fixtures
- Engineering applications
Advantages
- Maximum structural strength
- Excellent durability
- Greater resistance to compression
Keep in mind that higher infill also increases print time and filament consumption.
Does Higher Infill Always Mean Stronger Prints?
Not necessarily.
Several other factors also influence the strength of a printed part.
Important Factors Include
- Wall thickness
- Number of perimeters
- Layer adhesion
- Filament type
- Print orientation
- Print temperature
In many cases, increasing wall thickness provides greater strength than simply increasing infill percentage.
A well-balanced combination of these settings often produces better results than relying on high infill alone.
Choosing the Right Infill Pattern
The infill pattern is just as important as the percentage.
Popular Infill Patterns
Grid
- Fast to print
- Suitable for general-purpose models
- Good overall strength
Gyroid
- Excellent strength in multiple directions
- Efficient material usage
- Popular for functional parts
Cubic
- Strong internal structure
- Supports evenly distributed loads
- Ideal for mechanical applications
Triangles
- High rigidity
- Good for structural components
- Suitable for parts under constant stress
Selecting the right pattern can improve strength without increasing filament usage.
Tips for Better Strength Without Wasting Filament
Follow these practical tips to achieve stronger 3D prints while keeping material costs under control.
Recommended Practices
- Match the infill percentage to the purpose of the model
- Increase wall thickness before choosing very high infill
- Use stronger materials for functional parts
- Test different infill settings on smaller models
- Combine suitable infill patterns with proper print orientation
- Use recommended print temperatures for better layer bonding
Small adjustments can often produce noticeable improvements in print performance.
Conclusion
The ideal infill percentage depends on the intended use of your 3D print. Decorative models generally require only a low percentage, while functional and load-bearing parts benefit from higher infill combined with suitable wall thickness and proper print settings.
Understanding how infill affects strength, weight, and printing time allows you to make informed decisions for every project. By selecting the right infill percentage and pattern, you can produce stronger, more reliable prints while reducing unnecessary material usage.