PEI Double Sided Textured Build Sheet, Black w/ Magnetic Base

1 review

Price:
Sale price$23.95

Why Shop 3D META

  • Free Shipping - All orders over $149.
  • Quick Dispatch - Orders shipped out same or next day.
  • Quality Products - All stocked in Australia.
  • Safe and Secure Payments - Wide range of payment options.
  • Satisfaction Guaranteed - Free Returns within 14 days.
  • Knowledgeable Customer Service - Contact us with any questions.

Description

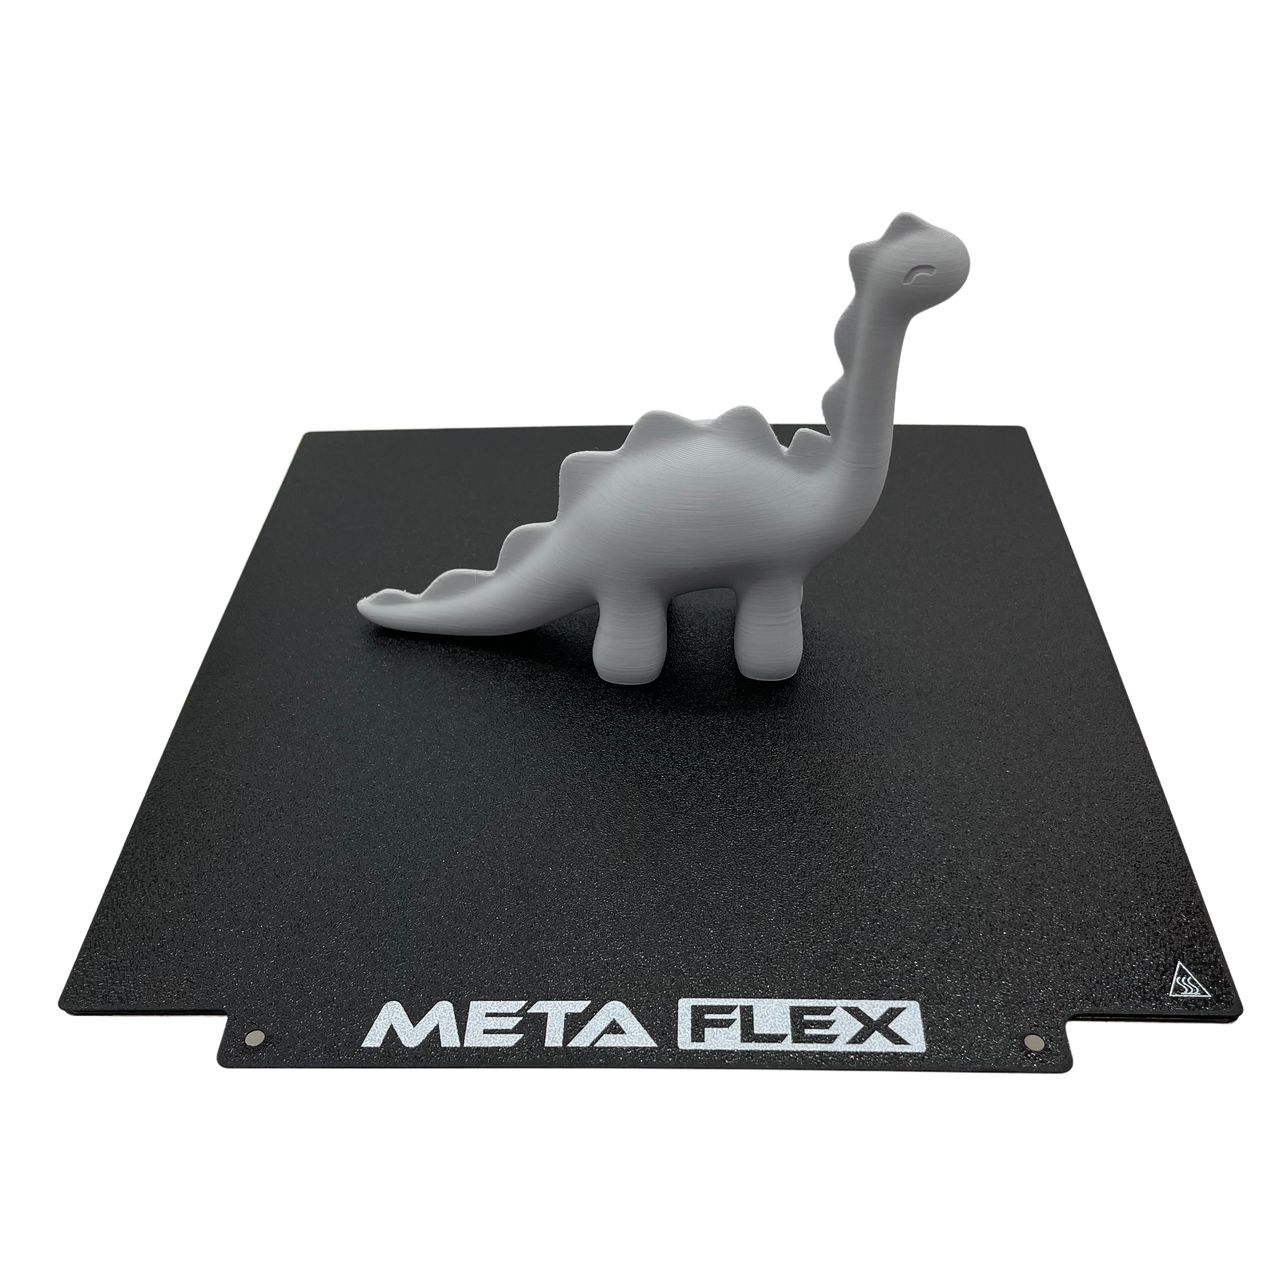
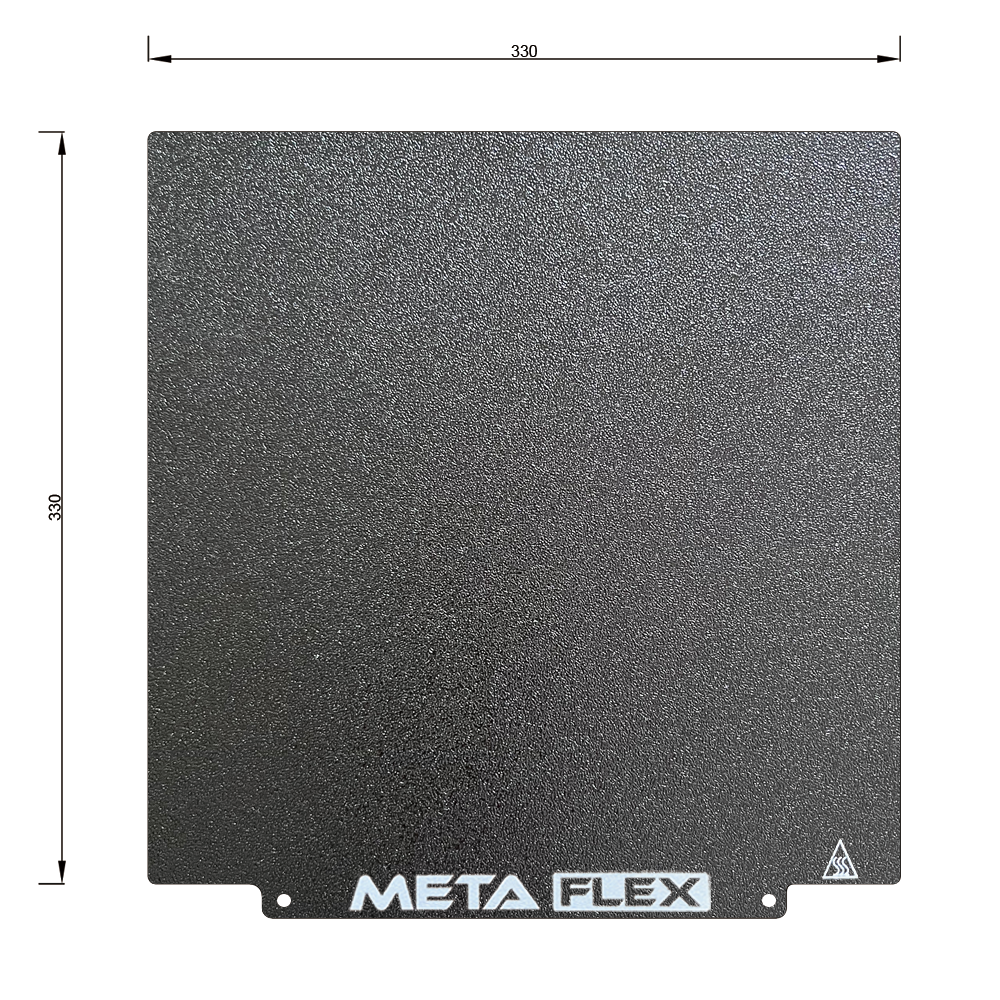
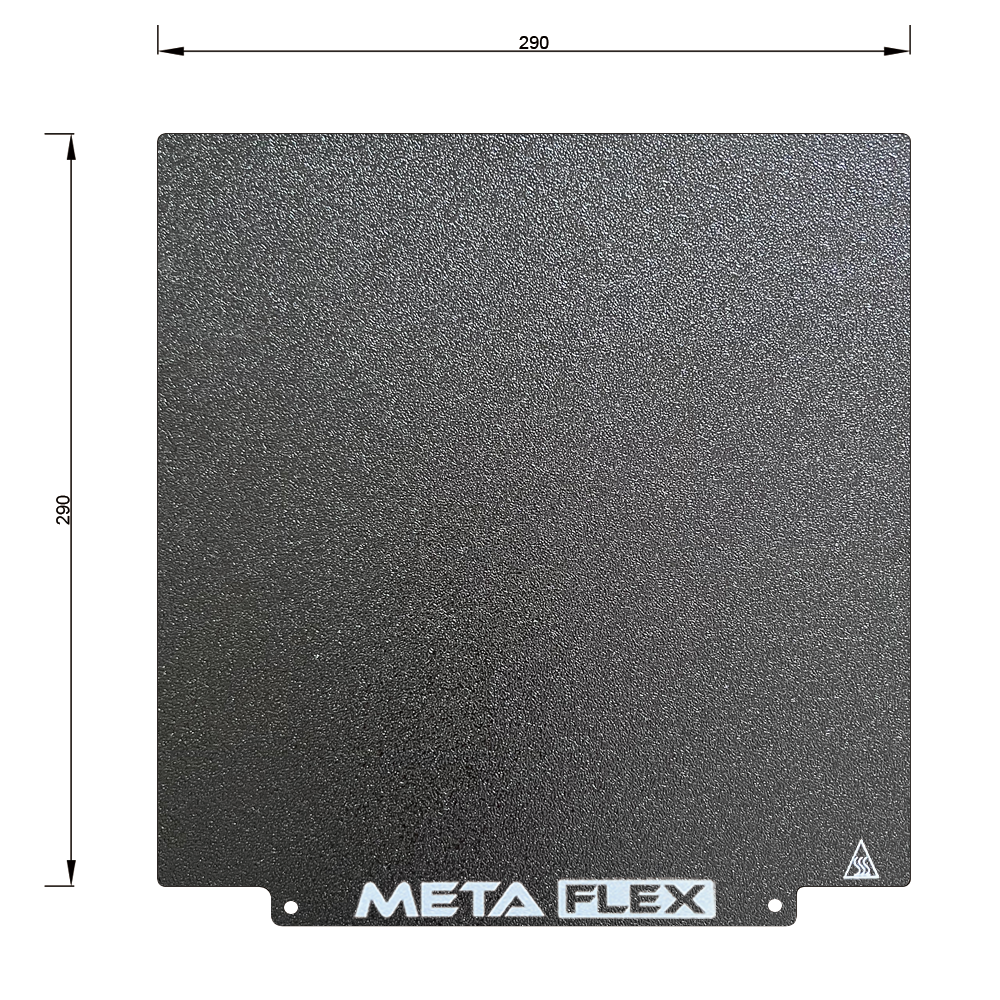
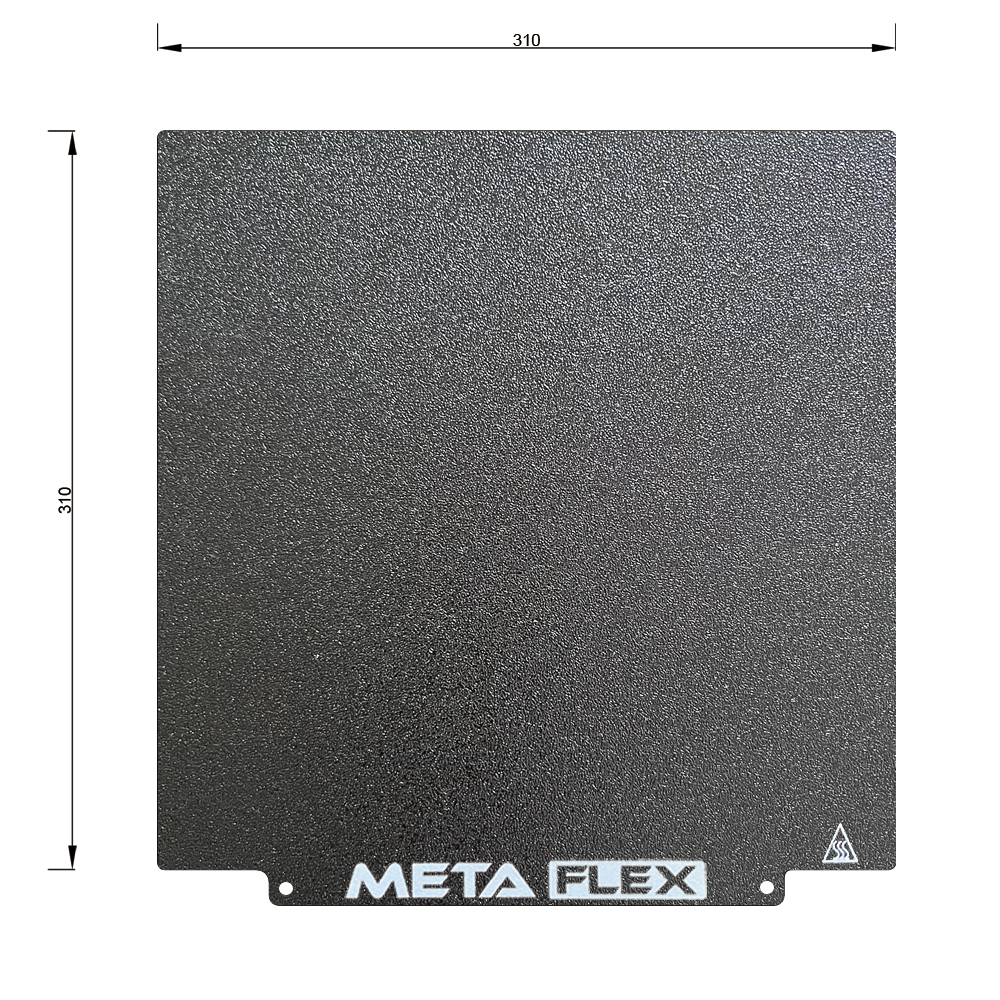
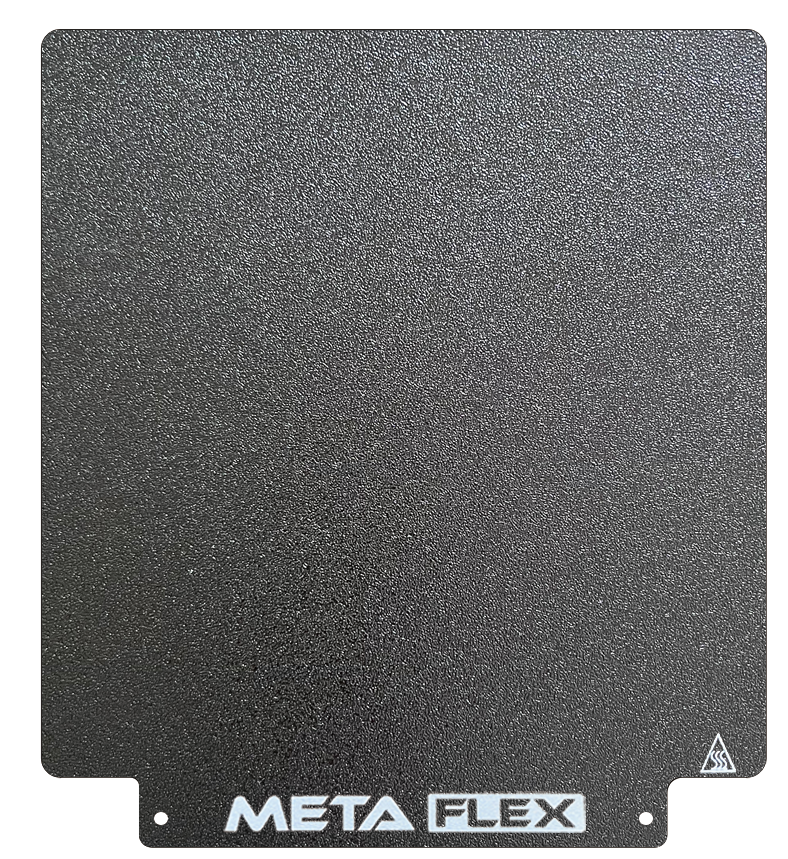
META FLEX's range of PEI textured build sheets are the 3D printer upgrade you wish you'd always had.

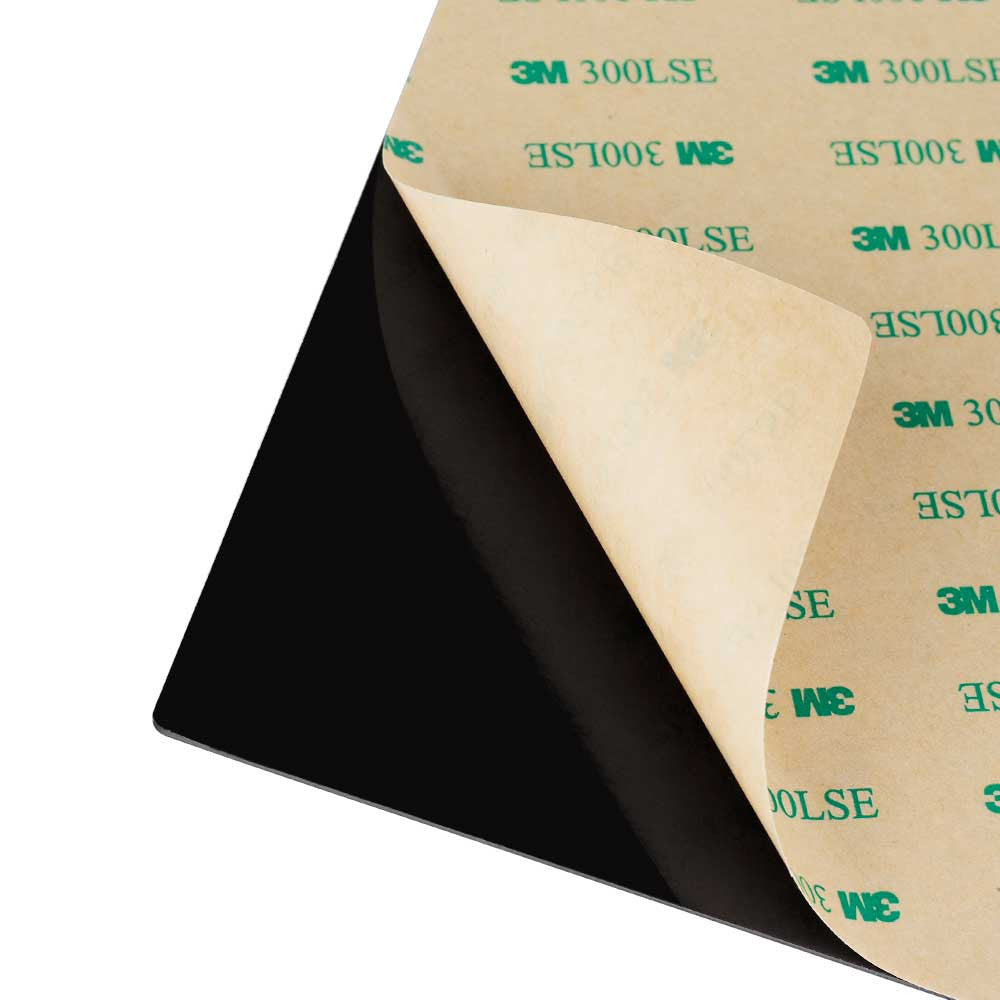
Built for optimal print adhesion and effortless removal, META FLEX's range of PEI build sheets come double side with a thick coating of black texture PEI and quality 3M backed magnetic plate. 

Features:

  • Texture PEI - Perfect for any print material, no tape or glue stick required, optimal print adhesion.
  • Flexible Plate - For effortless removal of prints.
  • Double Sided - For quick changing between prints. Remove model, flip sheet and go.
  • Black in Colour - Blends in with your printer, giving more emphasis on the model being printed. 

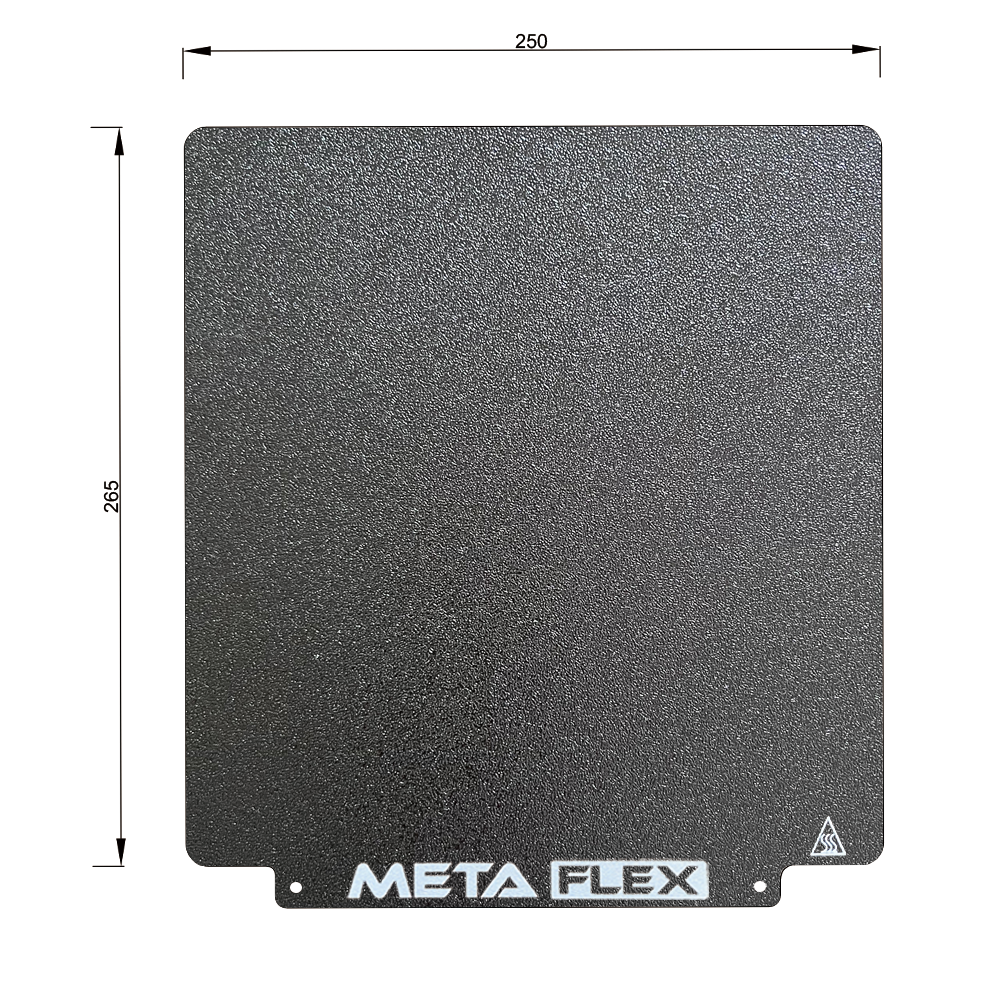
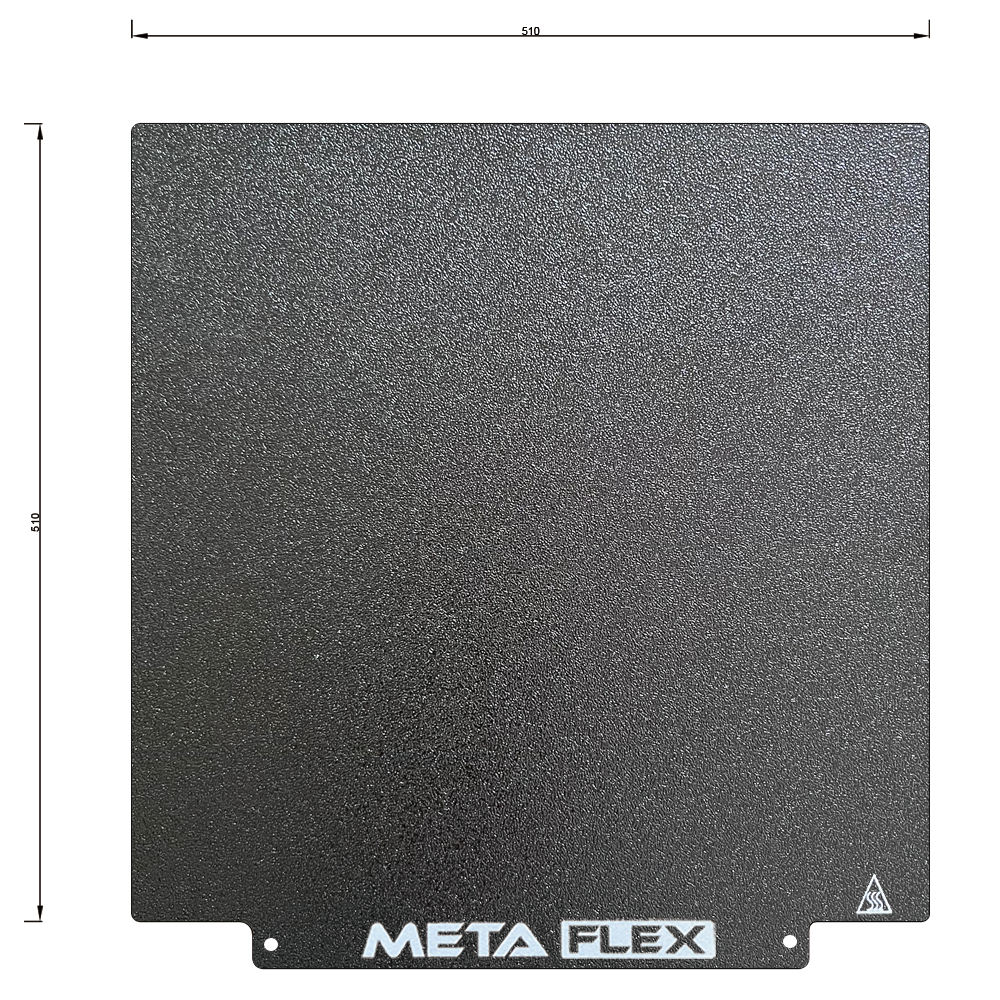
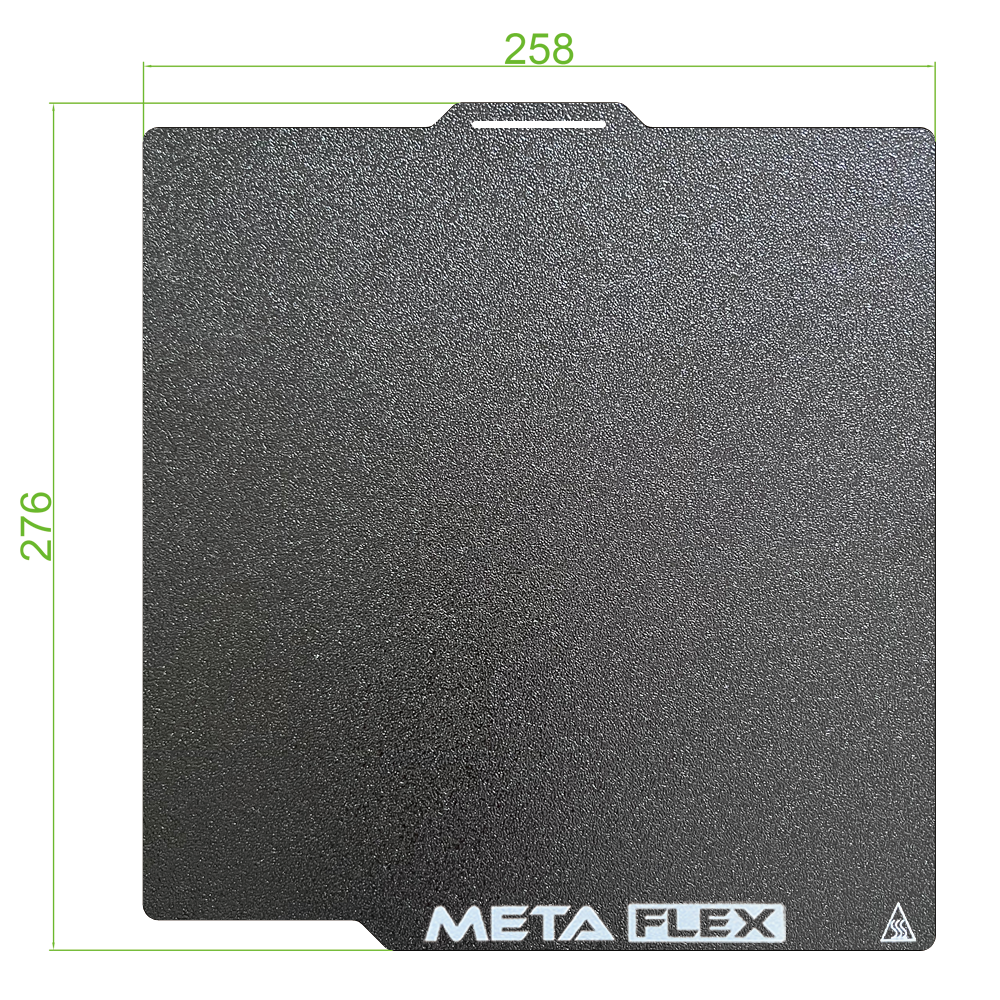
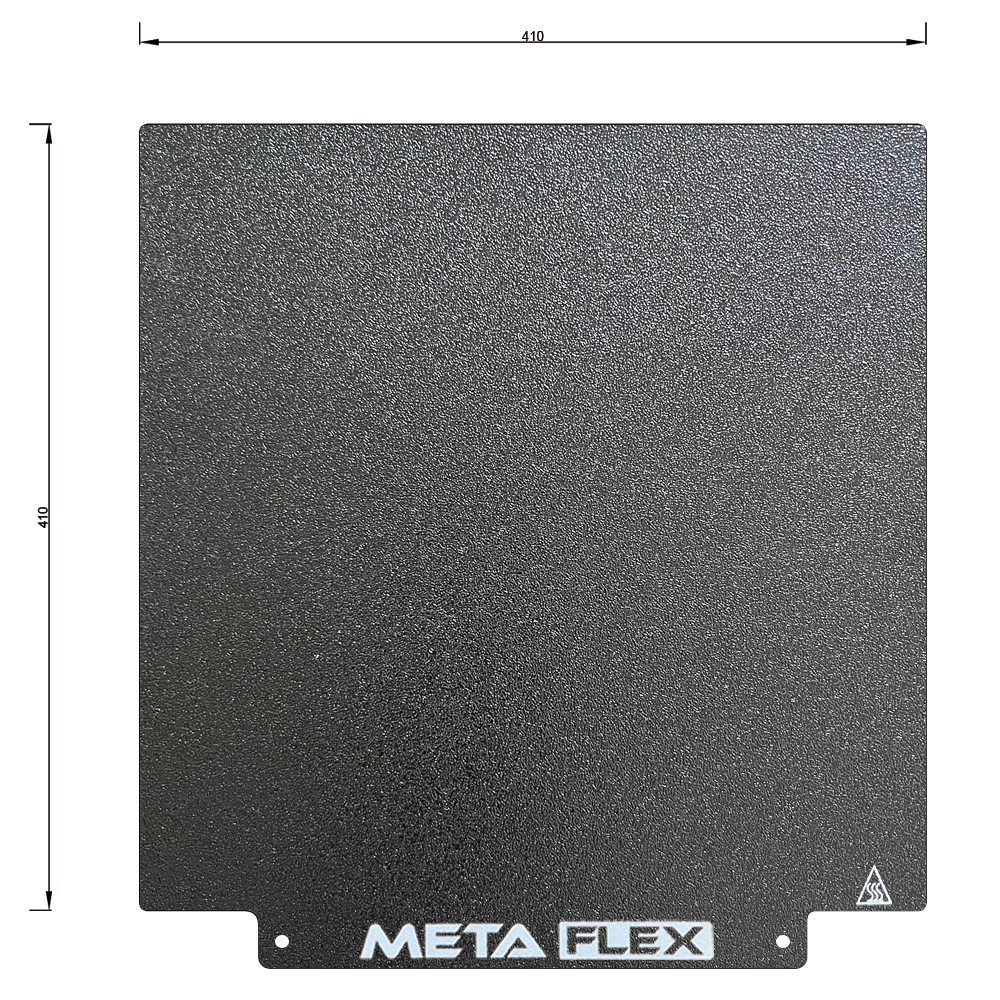
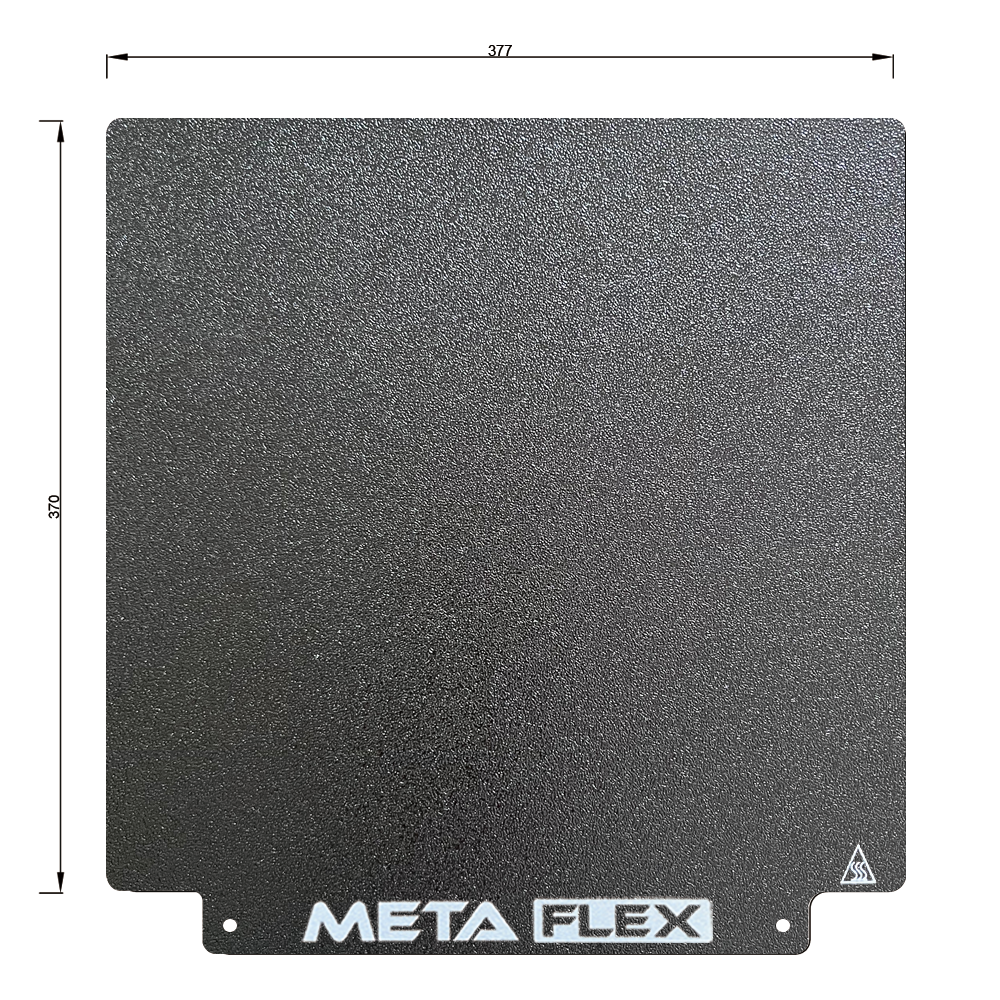
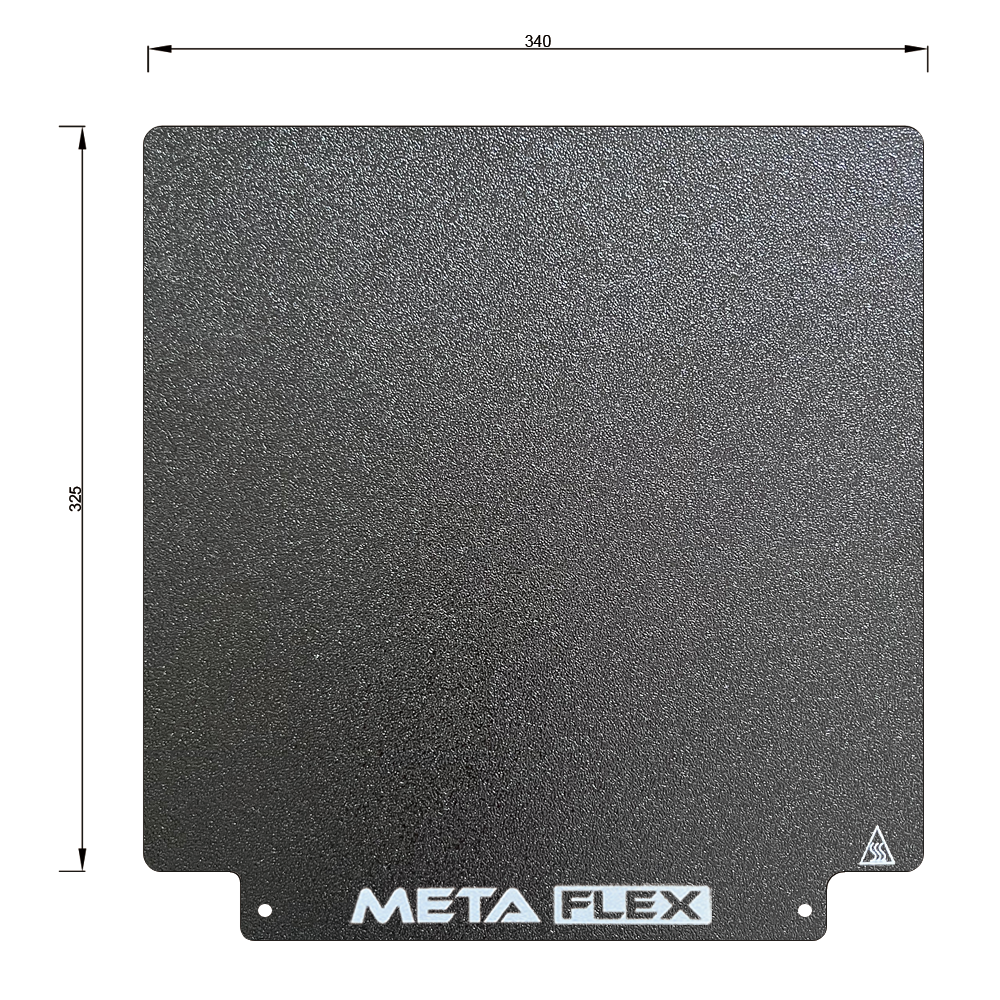
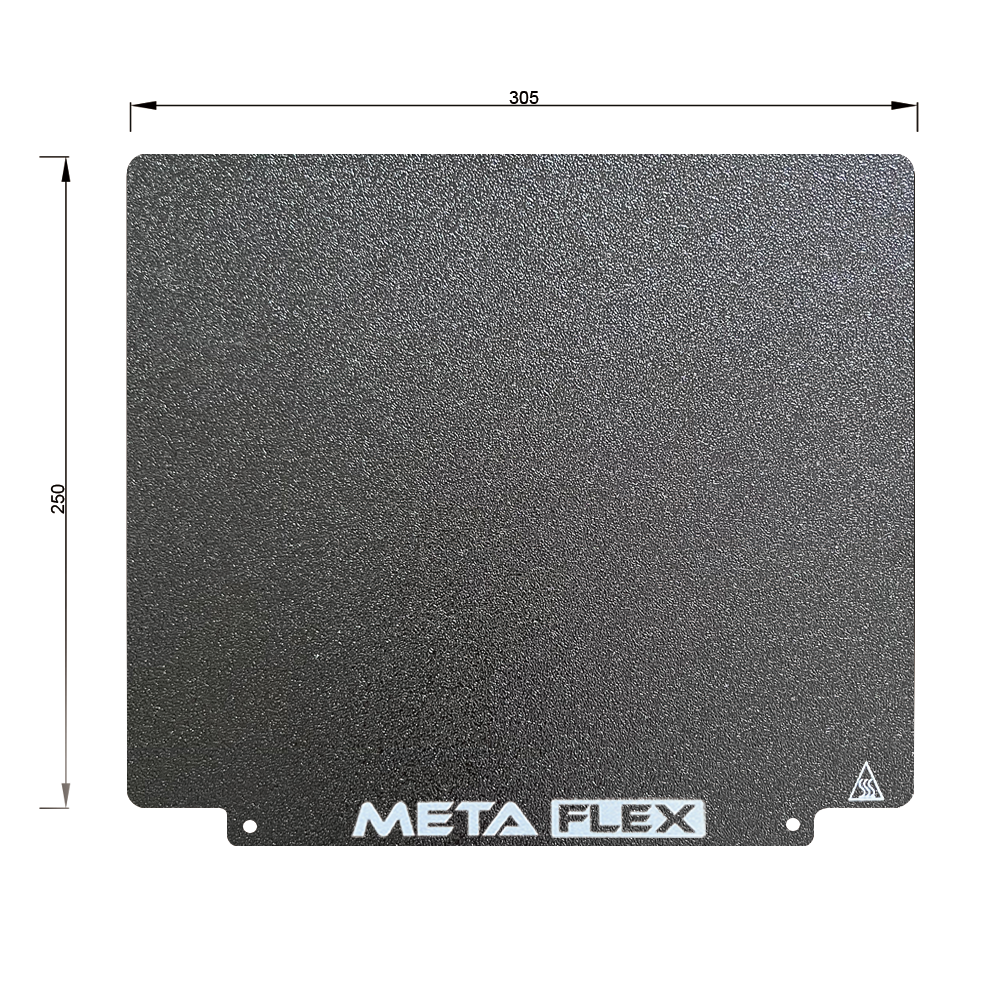
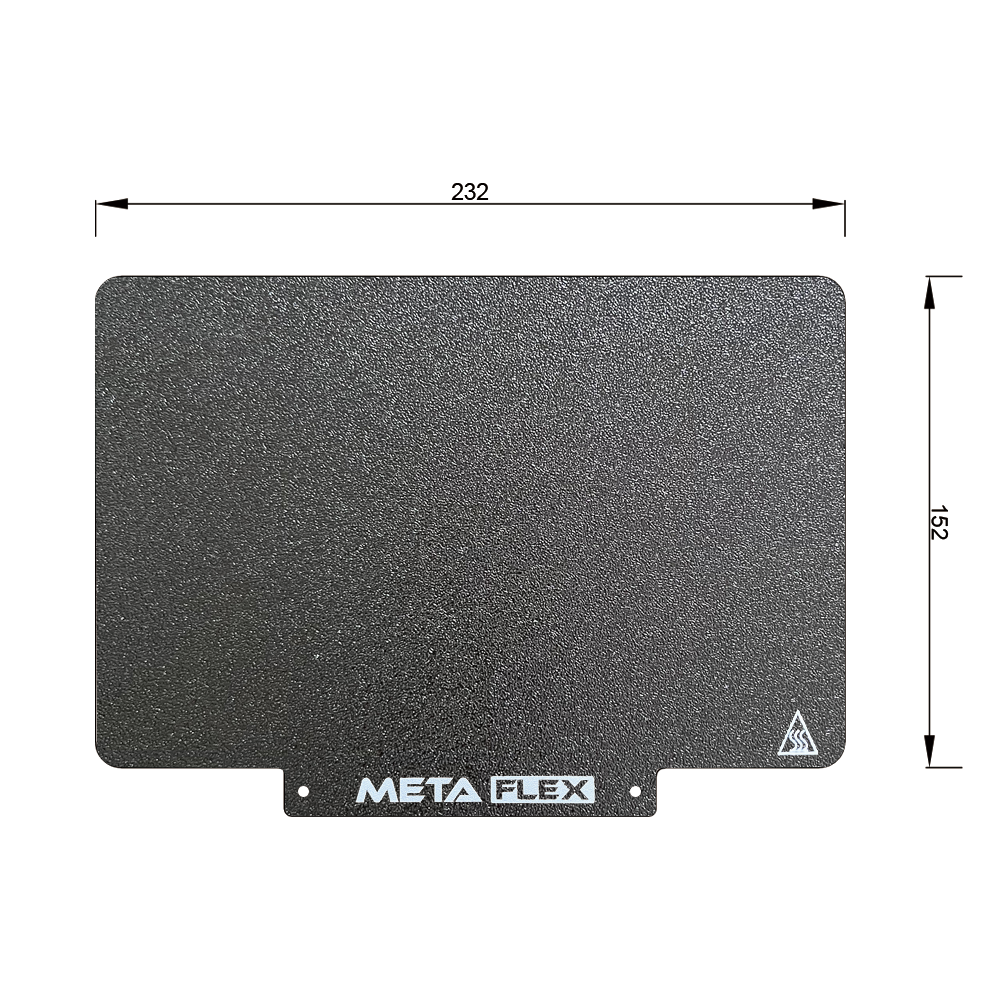
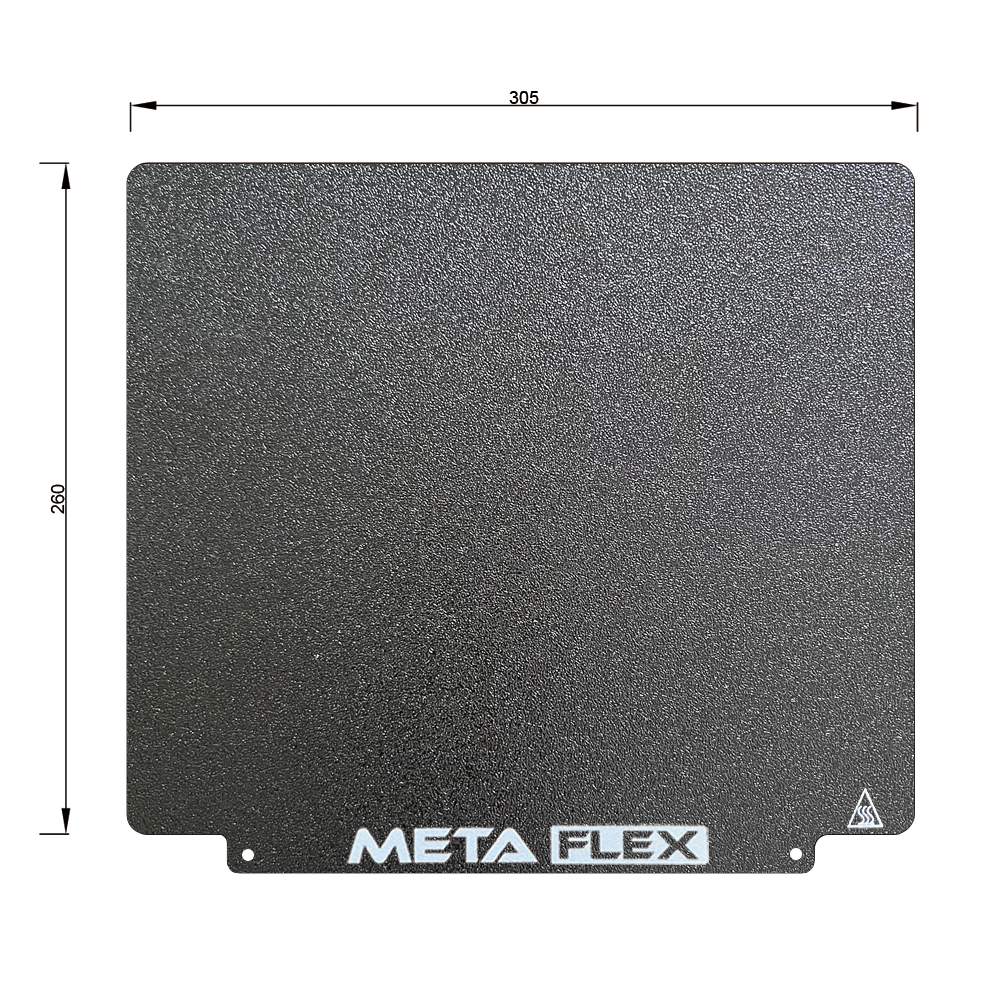
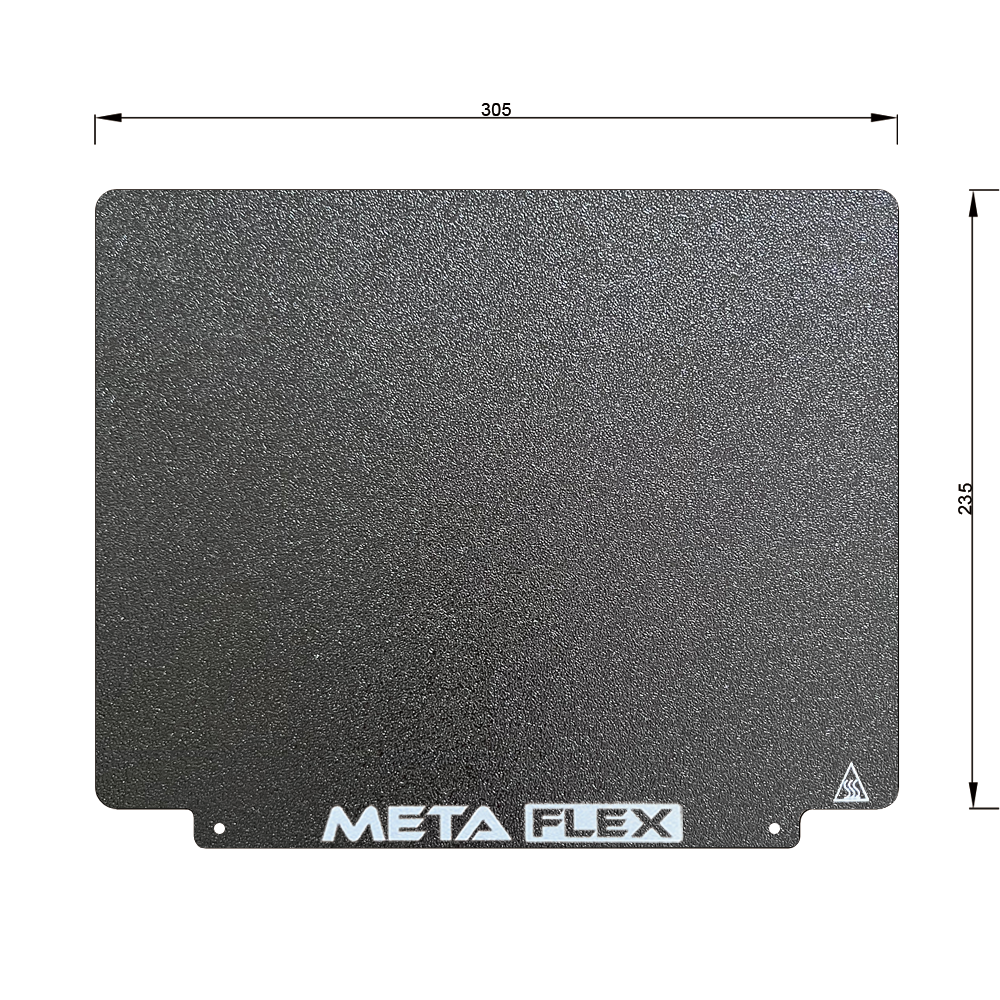
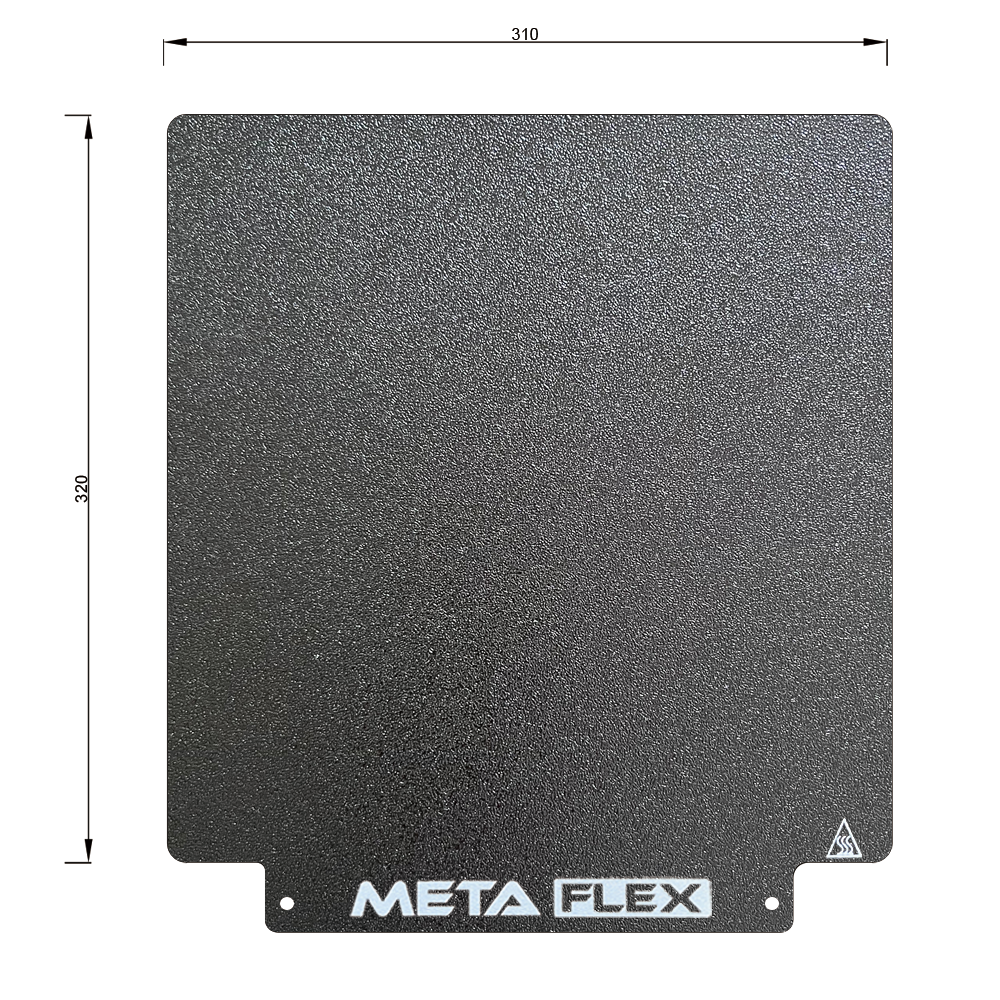
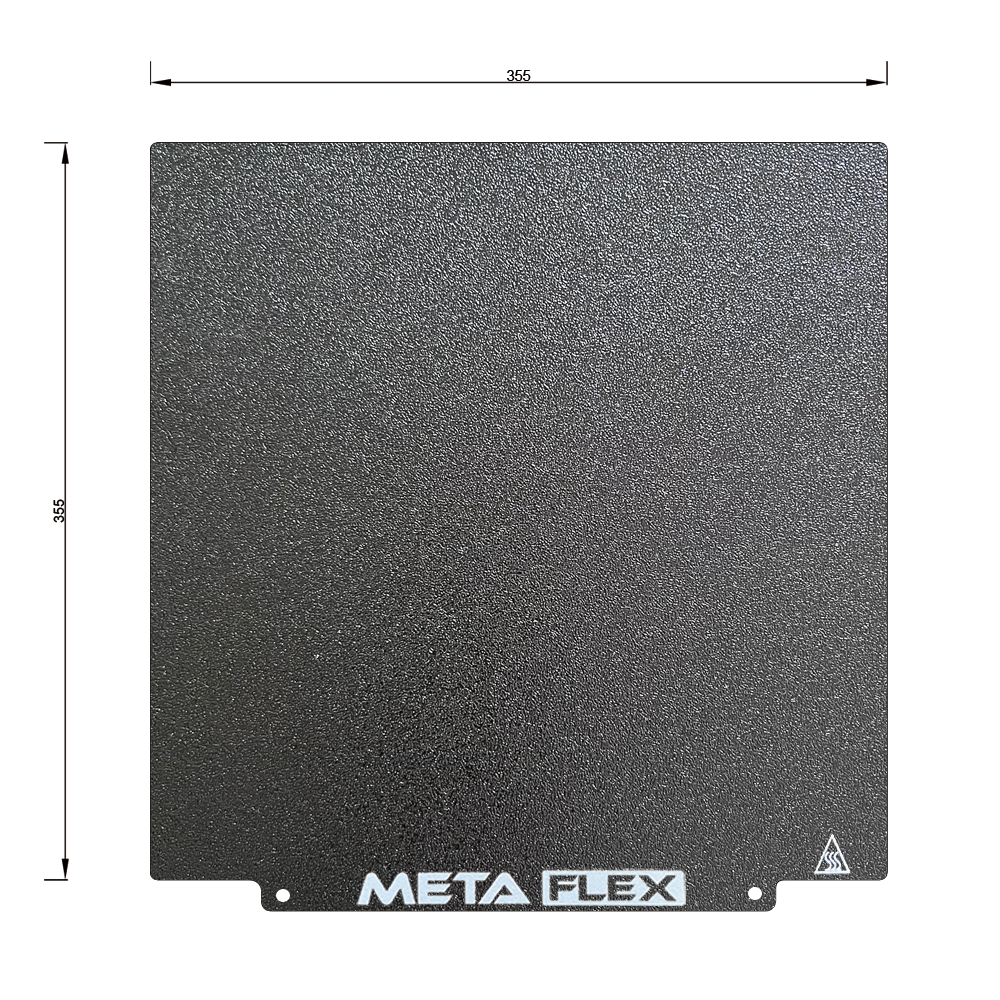
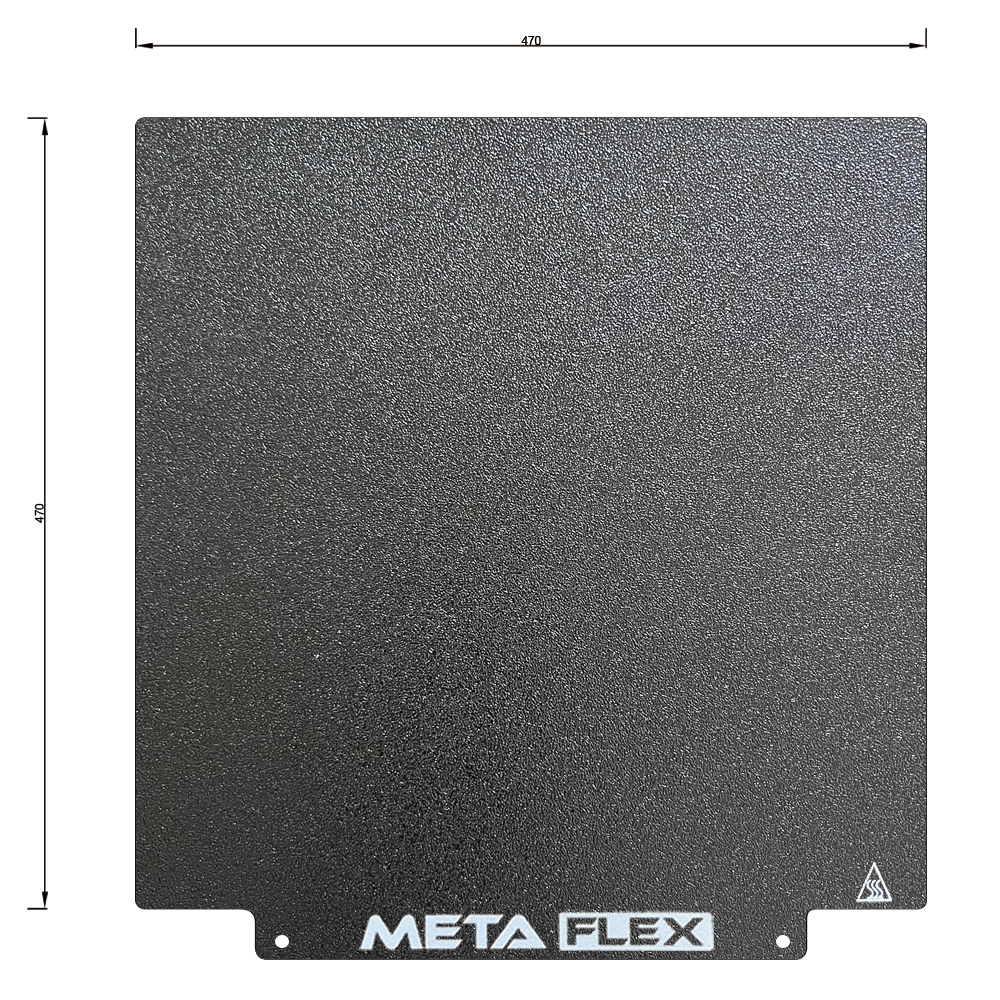
Selecting the right size:

Your printers build plate will almost always be larger that it's print volume, make sure you measure the full length of your build plate before selection or alternative use the below compatibility chart to find your model. If your model is not listed, please let us know the model and size and we will add it to the list. Any issues finding the right size or measuring your build plate please get in contact with us. 
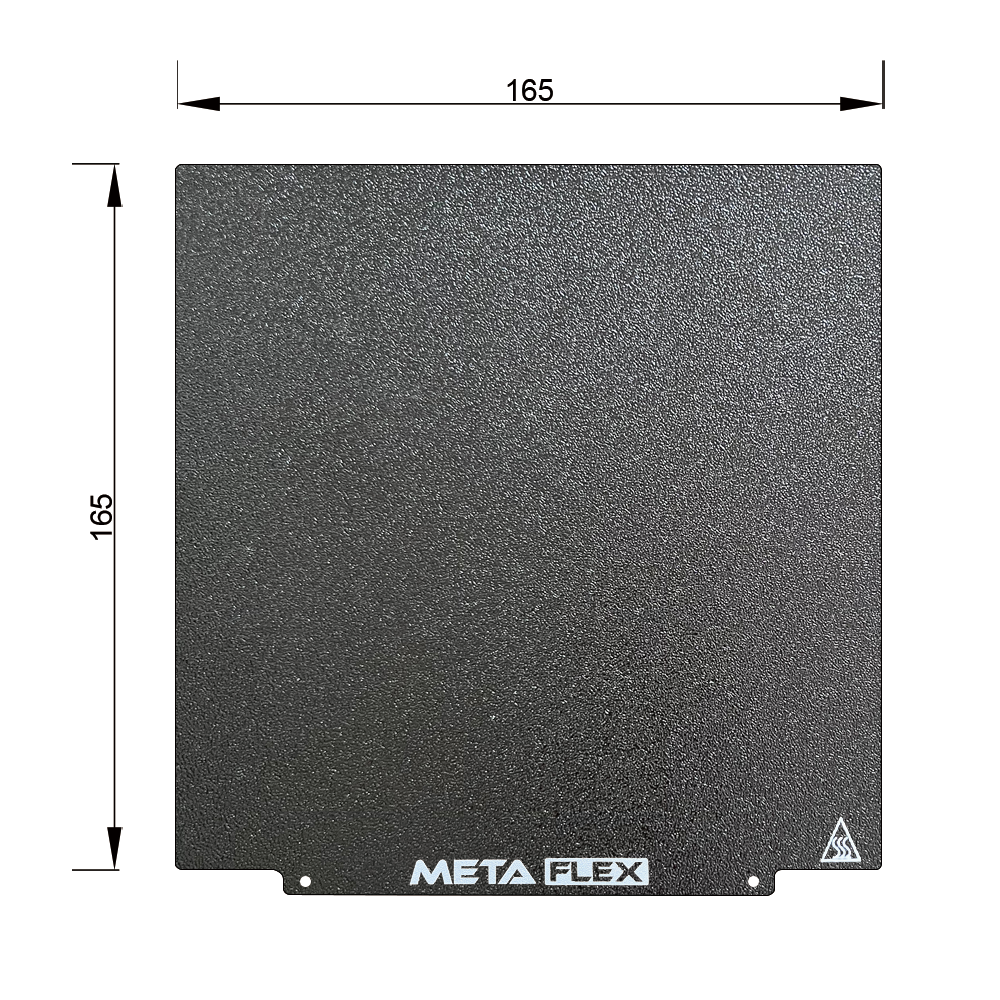
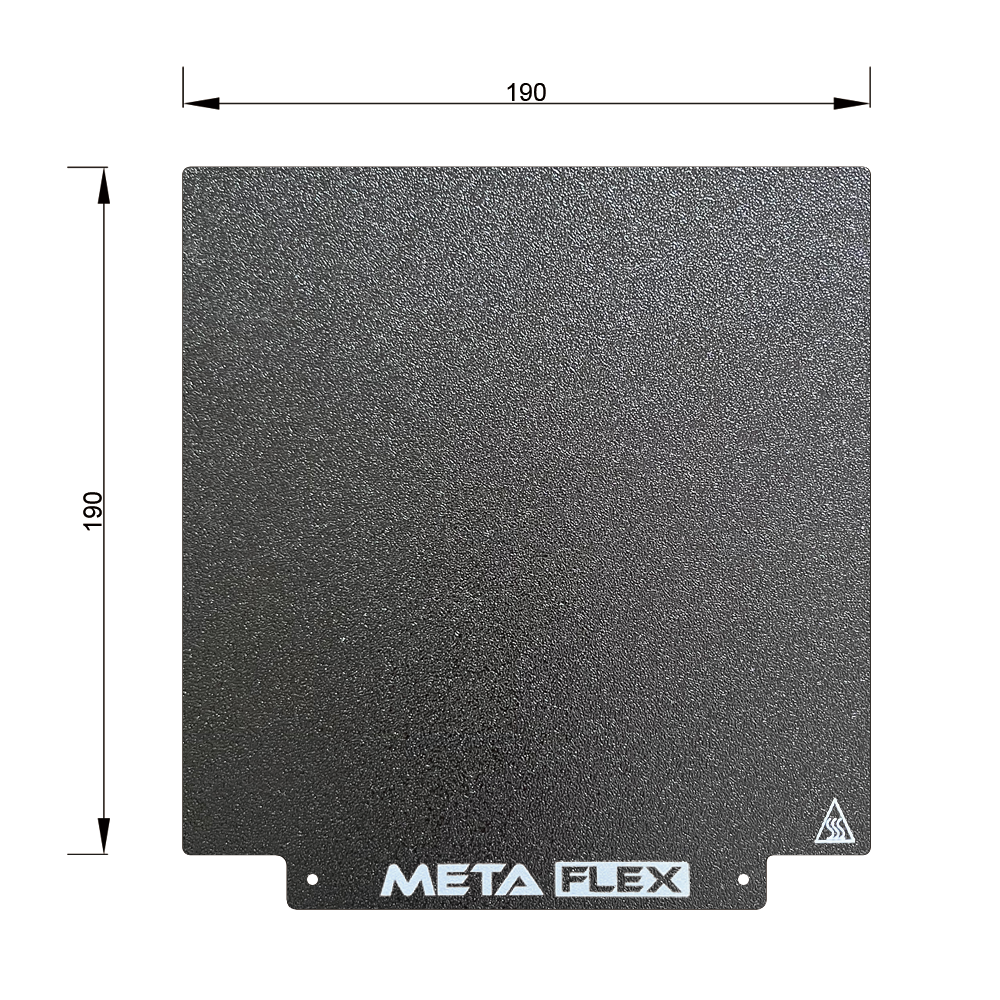
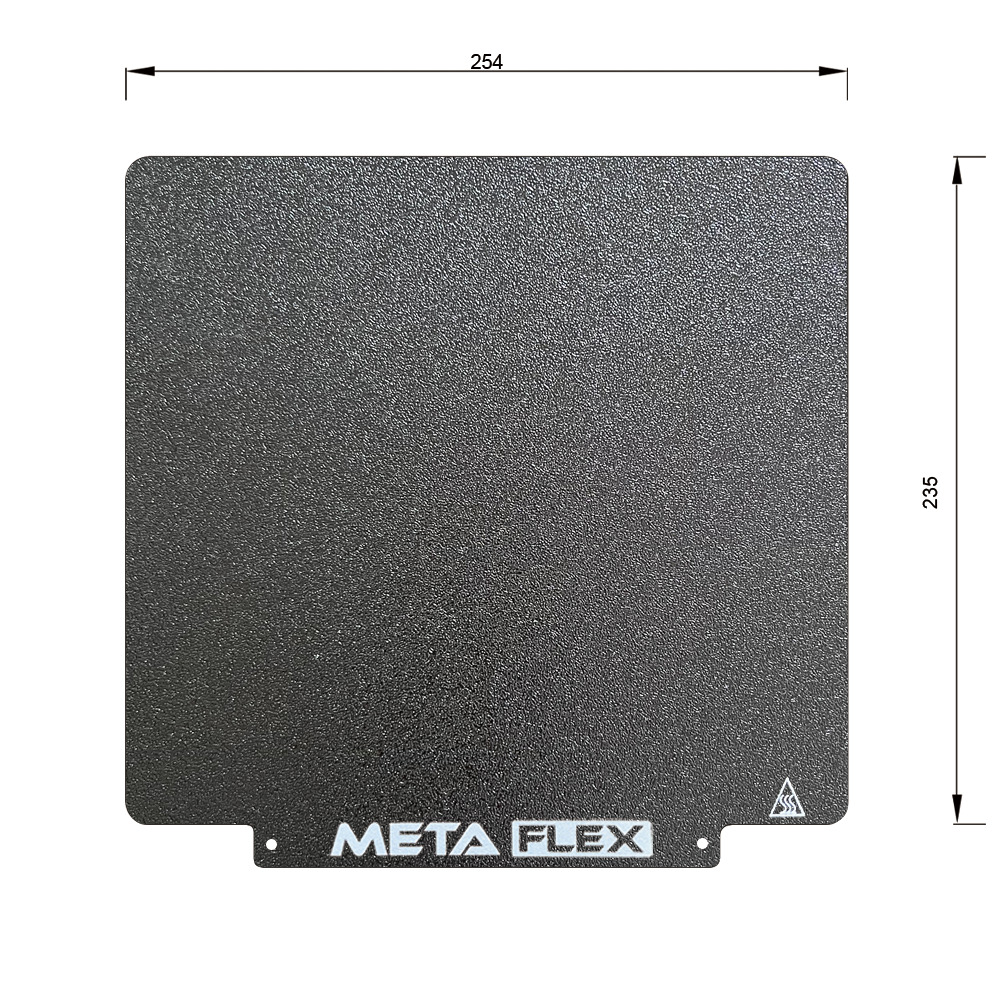
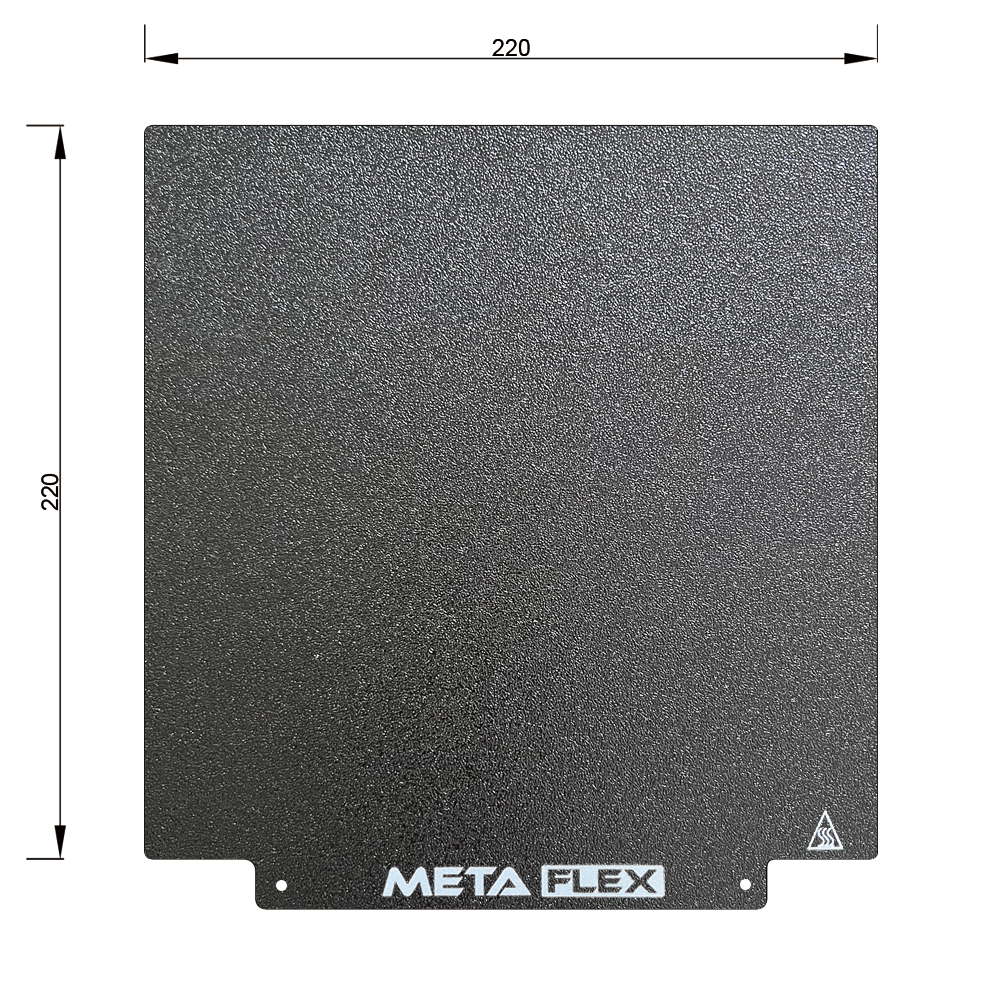
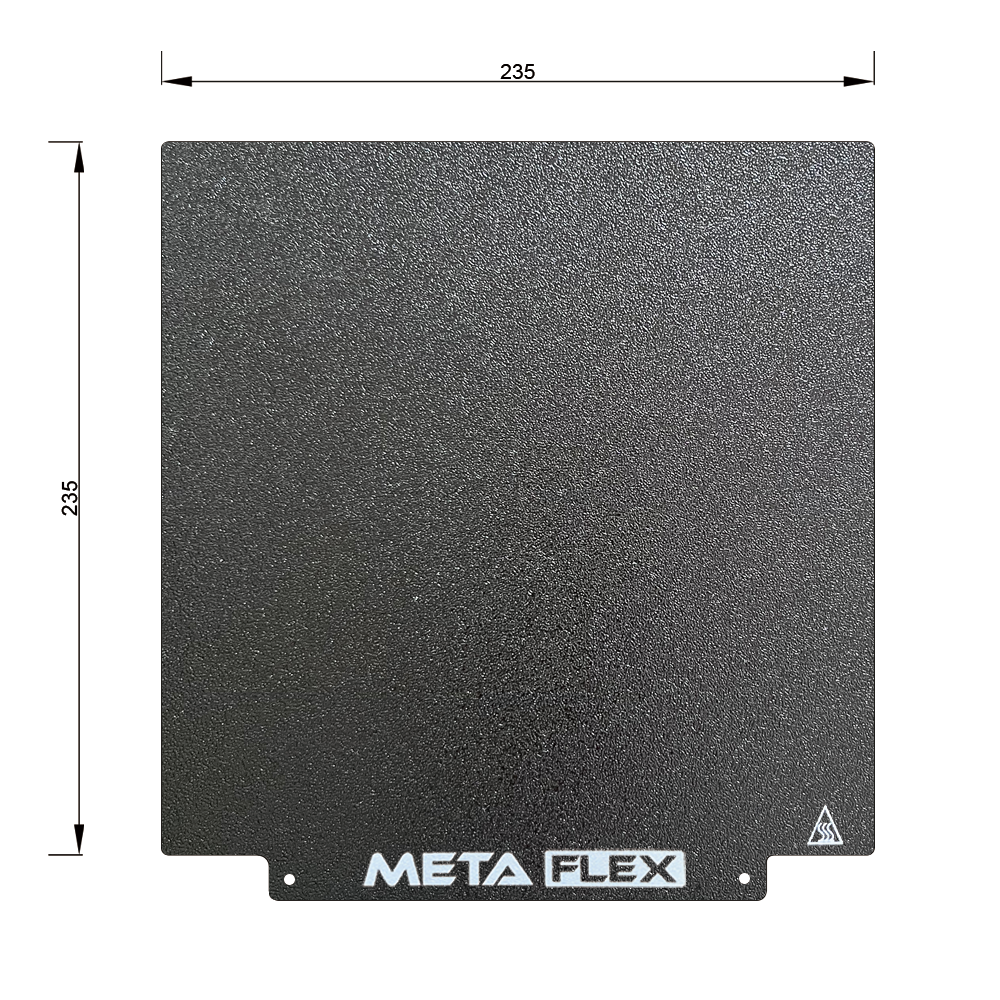
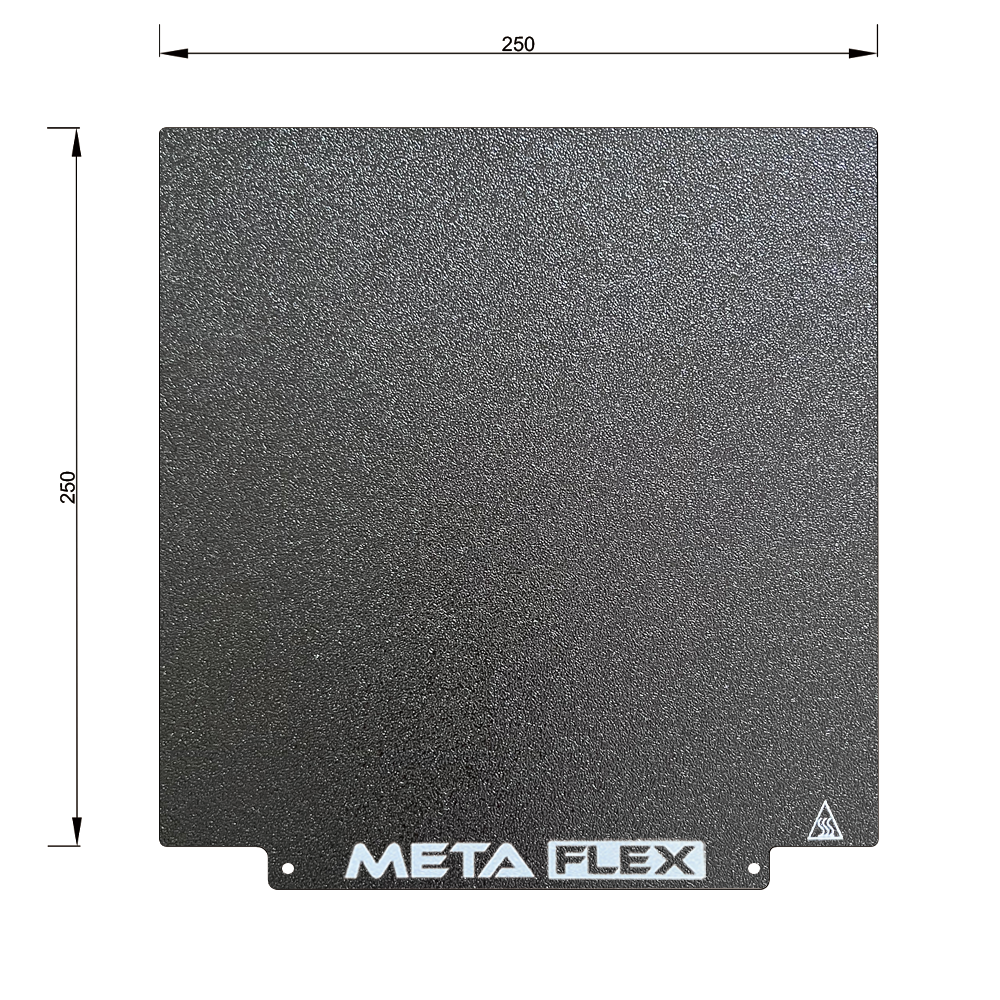
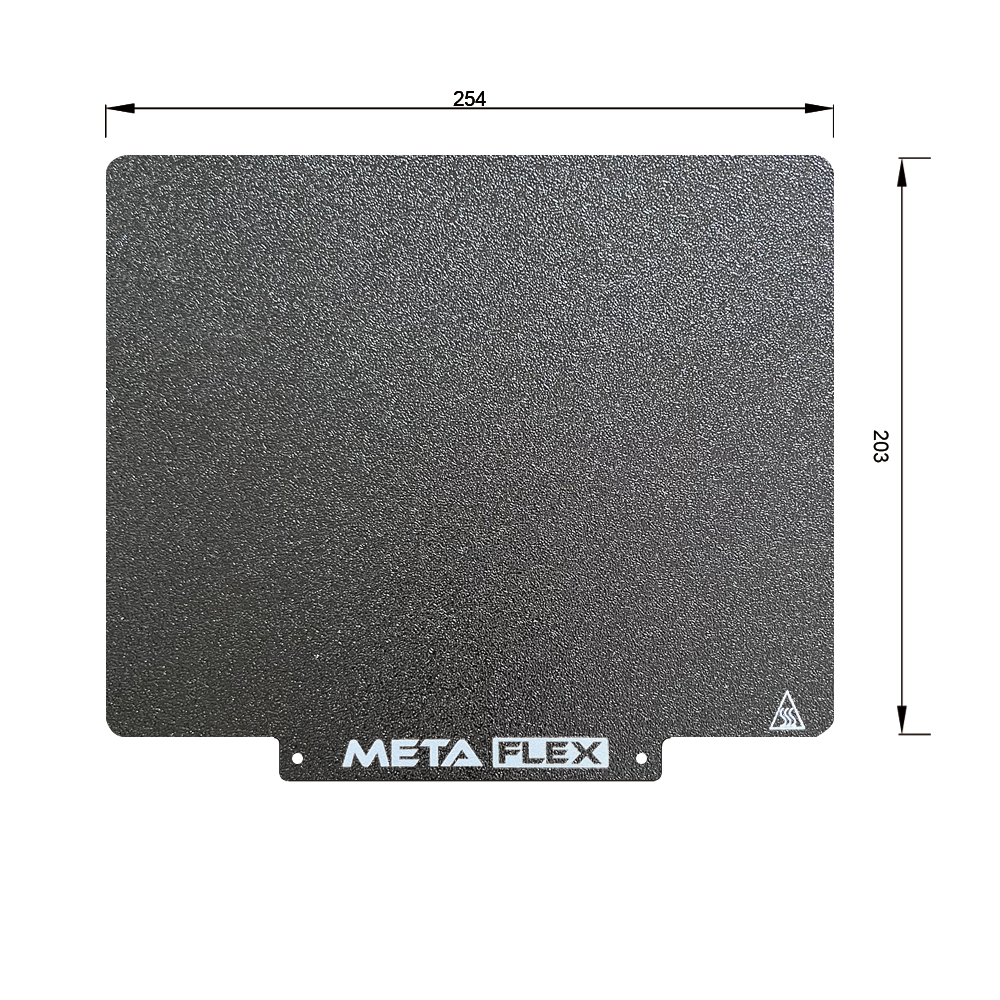
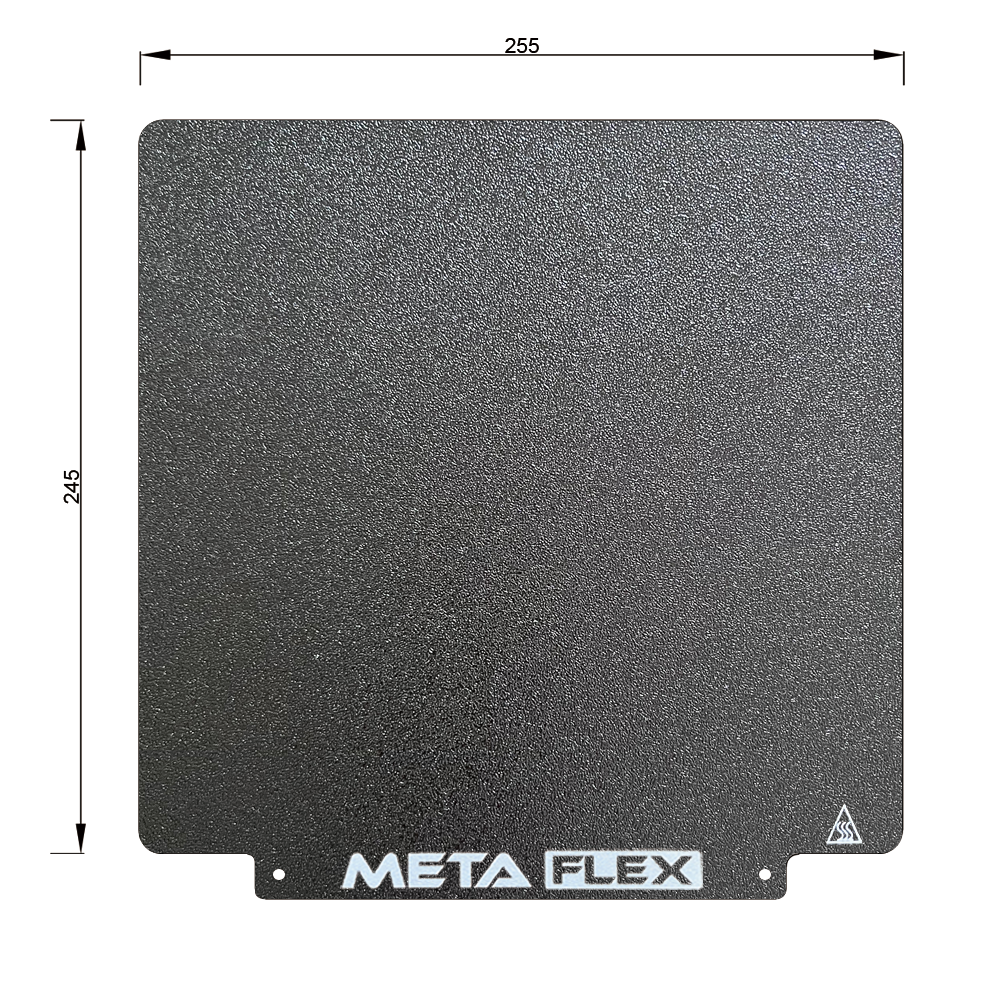
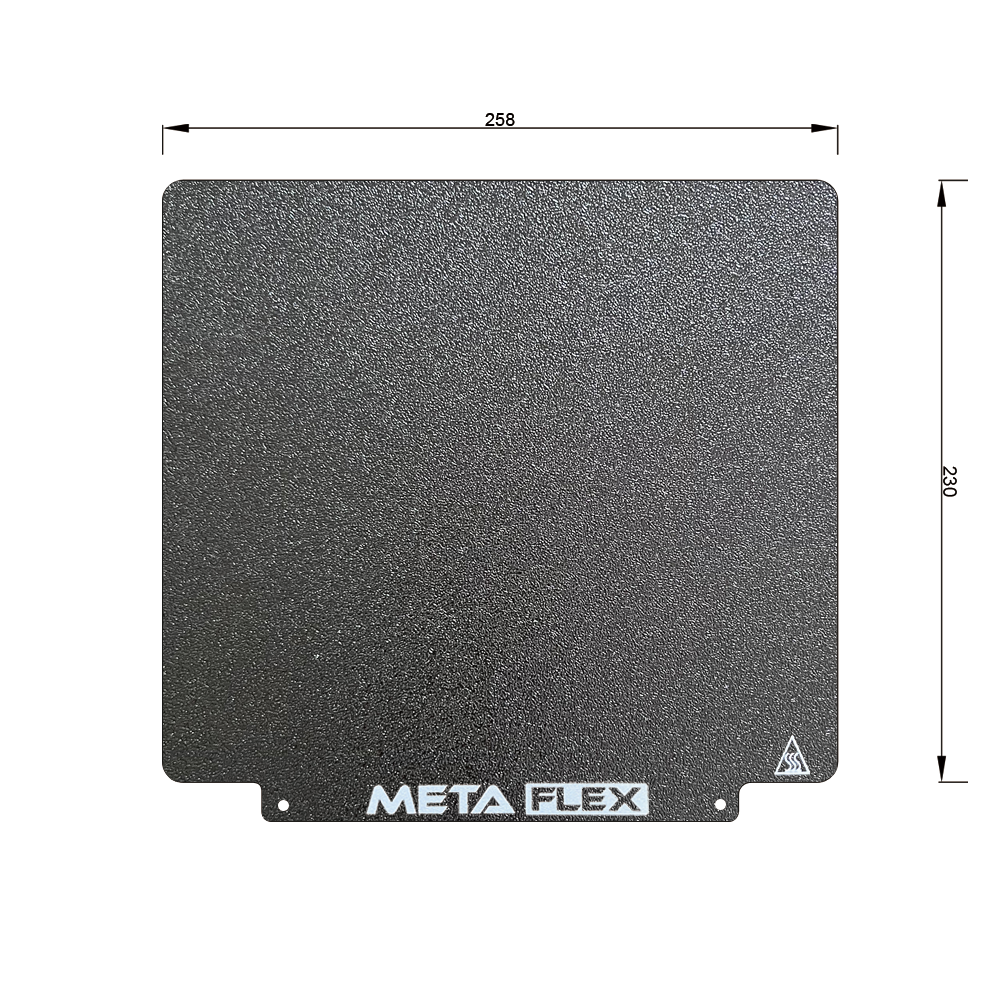
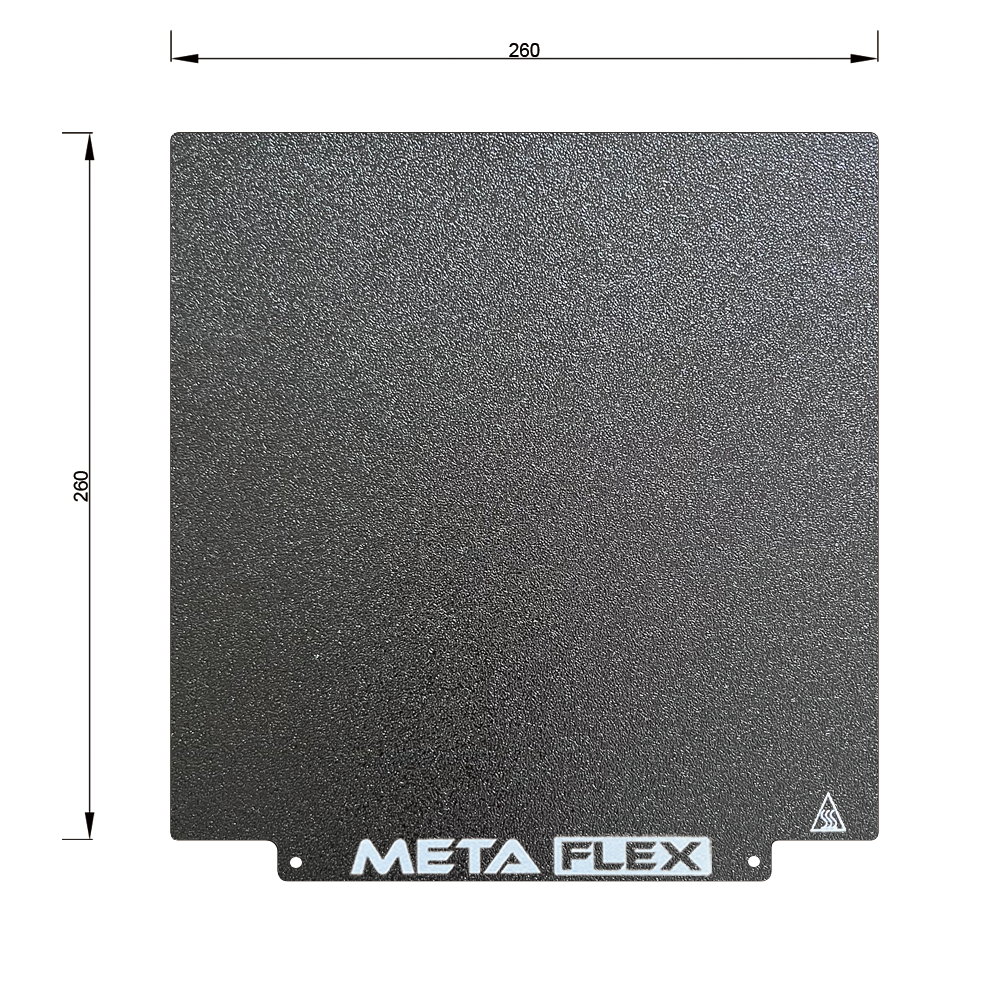
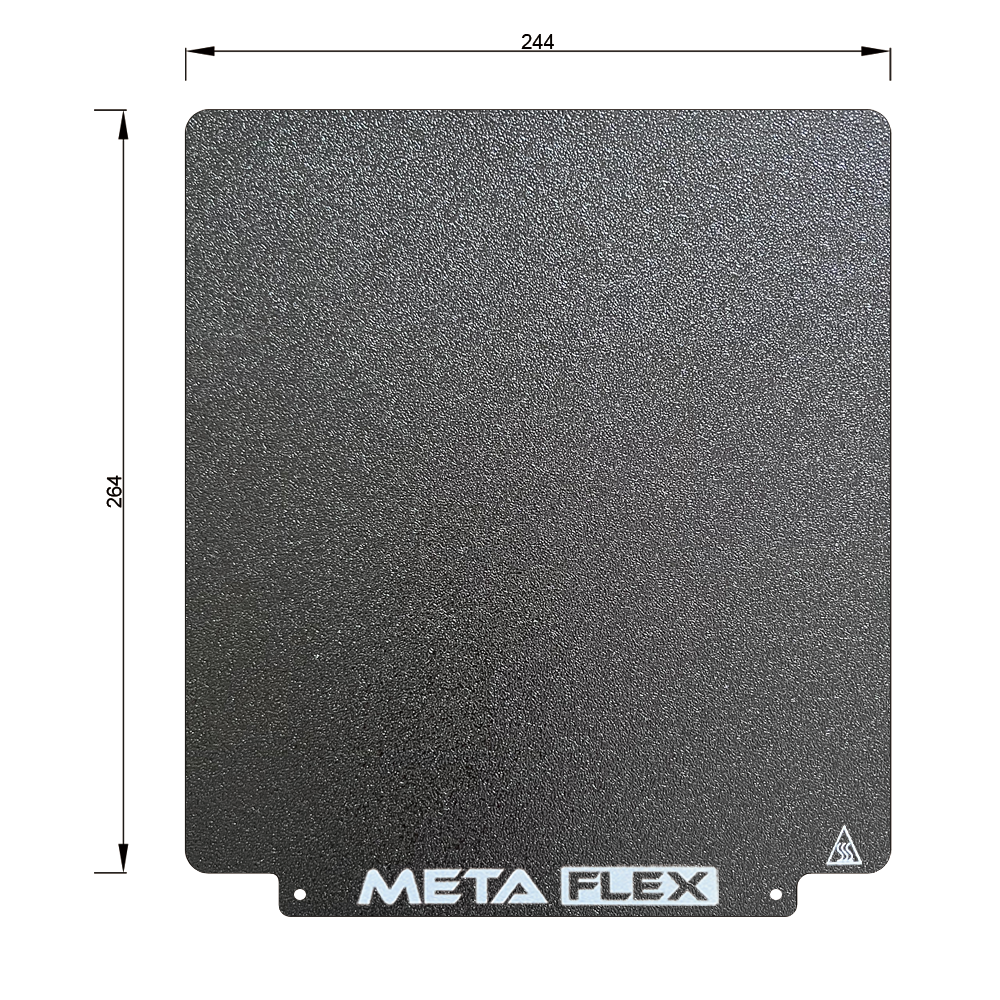
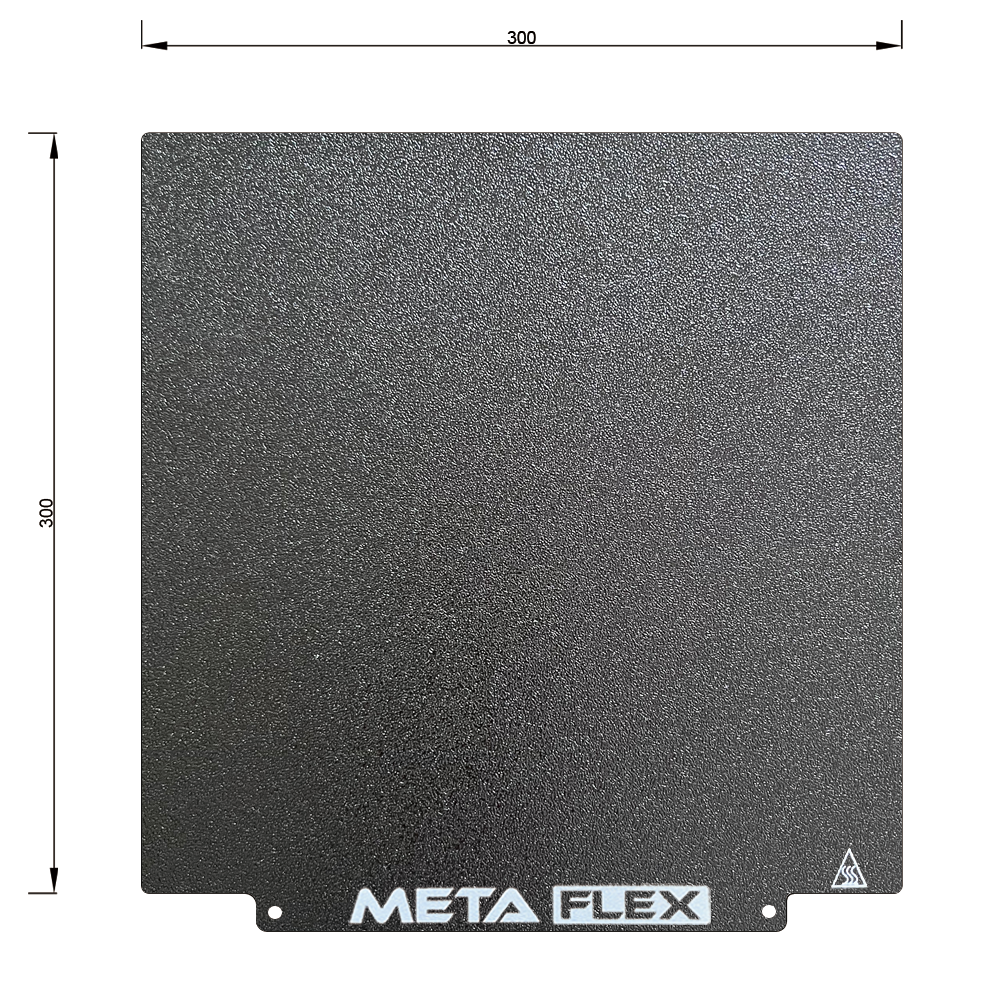
 Compatibility Chart
Size

Suitable Models

165 x 165mm

Creality Ender 2, Creality Ender 2 Pro, and Da Vinci Mini w+, Wanhaou i3 Mini, Tronxy X1, Tevo Michelangelo, Zonestar Z6F, Qiditech X-one2, Flashforge Adventurer 3, FlashForge Adventurer 3 Lite, FlashForge Finder

190 x 190mm Prusa Mini
220 x 220mm

Anet A8, Cocoon 3D Printer Touch, Wanhao Duplicator 6 and Duplicator i3 and i3 Plus, TronXY X2, TronXY P802M, Ultimaker 1, MonoPrice Maker Select Plus, Ultimate / V2, Robo R2 Anycubic Mega Pro, Anycubic i3 Mega, Anycubic Mega S

232 x 152mm FlashForge Creator / Pro, Flashforge Creator Max, Flashforge Dreamer, Flashforge Inventor, Makerbot Replicator
235 x 235mm

Anet et4, Creality Ender 3, Creality Ender 3 Pro, Creality Ender 3 V2, Creality Ender 3 S1, Creality Ender 3 S1 Pro, Creality CR-20, Ender 5, Ender 5 Pro, Ender 3 Neo, Ender-3 V2 Neo, TwoTrees Saphire Pro, Tevo Tarantula / Pro, Geeetech A10, Biqu B1, Elegoo Neptune 2/2S/2D/X/3/3 Pro, Voxelab Aquila, JGmaker Magic, Tevo Flash, Anycubic Mega Zero 2.0, Anycubic Kobra, Artillery Genius, Artillery Genius Pro, Artillery Hornet

250 x 250mm Voron V1, Biqu BX, Lotmaxx Shark V2
254 x 203mm

Makergear M2 and Makergear M3, CraftBot Plus Pro, Afinia H800 / H800+ / H+1

254 x 235mm Prusa i3 MK3/S/+, Raise3D N1, MatterHackers Pulse, Voron Switchwire
255 x 245mm

Voron 2.4 (250), Tronxy XY-2 Pro, Creality CR-6 SE, Robo3D R1+, Geeetech A20M, Lotmaxx Shark SC10 V1, and V2

258 x 230mm Ultimaker S2/S2+, Ultimaker S3, Eryone ER 20
260 x 260mm Geetech A20 /A20M / A20T/ Tronxy XY-2 Pro
*258 x 258mm Bambu Labs X1, P1P, P1S - Doesn't come with magnetic base as machine already has one.
264 x 244mm Snapmaker A250
265 x 250mm Anycubic Vyper
290 x 290mm Creality Ender 6
300 x 250mm Qidi X-Max / Flashforge Creator Pro 3
300 x 300mm

LulzBot TAZ Workhorse, TAZ Pro, TAZ 6, TAZ 5, TAZ 4, TAZ 3, Anet A8 plus, Anet et5, Anet et5 pro

305 x 235mm CR-10 Mini, Creality CR-5 Pro
305 x 260mm Flashforge Guider 2
310 x 310mm

Creality CR-10S/CR-10, Hictop CR-10, Hictop Hero d3, JG Aurora A5 / A5x, Artillery Sidewinder X1/X2, Folger Tech FT-5, Creativity 3D Elf CoreXY, SainSmart Coreception CoreXY, BIQU Thunder, ADIMLab Gantry, Wanhao D9 (300), Tenlog TL-D3 PRO, Sunlu S8, JGMaker Artist-D Dual Extruder, ZYLtech Gear Printer, Longer LK1, BIQU B1 SE Plus, Makerbot Z18, Hictop D3 Hero, Creality Ender 3 S1 Plus, Creality CR-10 Smart Pro, Folger Tech R2, Tevo Tornado, Anet E12, Alfawise U20, Raise3D N2, Type A Machines Series 1 Pro, Zortrax M300, RAISCUBE T8, XYZprinting da Vinci Super, Airwolf EVO, Migo L

320 x 310mm

Creality CR-10S Pro, Creality CR-10S Pro V2 and V3, Creality CR-X, Creality Ender 3 Max, Creality CR-10 V2, Creality Ender 3 Max, Creality Ender 3 Max Neo, Formbot Troodon 300, goofoo Nova, and Anycubic Kobra Plus, Anycubic Mega X, Kywoo Tycoon Max, Sovol SV04

330 x 330mm Geeetech A30 / Tronxy X3S / X5S / X5S Pro / Raise 3D Pro2 / Pro2 Plus
340 x 325mm

Fits: Railcore II 300ZL and Daedalus 3d Printer, Raise3D N2 Plus, Rasie3D Pro2, Rasie3D Pro2 Plus

355 x 355mm

Voron 350 V2, Sovol SV03

377 x 370mm Creality Ender 5 Plus
410 x 410mm

Creality CR-10S4, German RepRap X400, FORMBOT Raptor, T-REX and 2+ , Vivedino T-Rex 3.0 and Raptor 2, gCreate gMax, Voron Core XY, Anycubic Kobra Max, Formbot Troodon 400, Tronxy 5SA-400, Anycubic Chiron, gCreate gMax 1.5 XT+, Alfawise U10, HE3D H500, RAISCUBE T9, Mass Portal Grand Pharaoh ED 40

470 x 470mm Creality CR-10 Max
510 x 510mm Creality CR-10 S5, Cultivate3d the Beast V2/ Rat Rig V-Core 3 500


Installation:

  1. Cleaning build plate - Before installing magnetic base, thoroughly clean your build plate with IPA (Isopropyl alcohol) and a microfiber cloth to remove any dust, grease, or debris.
  2. Applying magnetic base - Peel backing paper 5cms from back edge of magnet, align both back corners of magnet with the back corners of your build plate. Once aligned push down on magnet to stick the exposed back surface. Slowly begin peeling the rest of the backing paper while pushing down and smoothing out the magnet so it sticks to the build plate with minimal air bubbles. Continue this process until backing paper is fully removed and magnet is fully applied to the surface.
  3. Remove air bubbles – To ensure surface is as flat as possible use a plastic card to push air bubbles to the edge of the magnet. Any large air bubbles that can’t be pushed out can be popped with a pin. Considerable force is required to penetrate through the magnets surface, once popped use card to smoothen out bubbled area.
  4. Cleaning META FLEX sheet - Before installing your META FLEX sheet you will need to clean both sides with IPA (Isopropyl alcohol) and a microfiber cloth to remove any grease or residue that might have remained following the manufacturing process.
  5. Installing META FLEX sheet – Now that the magnetic base is installed you can fit your META FLEX sheet. Simply line up the back edge of the sheet with the back edge of the magnetic base, slowly drop the sheet into place. The magnetic pull from the base will also help pull the sheet down into place.
  6. Levelling and print removal – Installation is now complete, before printing you’ll need to level your bed as per normal and adjusting accordingly.

To remove model from your META FLEX sheet, allow some time for sheet to cool so you don’t burn your hands. Using the tabs at the front, peal META FLEX sheet away from the magnetic base. Then holding opposite sides of the sheet, flex up and down until model releases. For bigger models you may need to rotate sheet and flex from all 4 sides. 

Maintenance:

Using IPA (Isopropyl alcohol) and a microfiber cloth, we recommend cleaning your META FLEX sheet in between each print to remove any dust, grease, or debris that may cause adhesion issues while printing.

We also recommend regular cleaning of your magnetic base with IPA (Isopropyl alcohol) and a microfiber cloth.

Customer Reviews

Based on 1 review
100%
(1)
0%
(0)
0%
(0)
0%
(0)
0%
(0)
H
Hamish Middlebrook

PEI Double Sided Textured Build Sheet, Black w/ Magnetic Base

You may also like